(!)Due to Microsoft's end of support for Internet Explorer 11 on 15/06/2022, this site does not support the recommended environment.
Mon. - Fri. 8 a.m. - 6 p.m.
All Categories
Categories
- Automation Components
- Linear Motion
- Rotary Motion
- Connecting Parts
- Rotary Power Transmission
- Motors
- Conveyors & Material Handling
- Locating, Positioning, Jigs & Fixtures
- Inspection
- Sensors, Switches
- Pneumatics, Hydraulics
- Vacuum Components
- Hydraulic Equipment
- Spray Equipment And Accessories
- Pipe, Tubes, Hoses & Fittings
- Modules, Units
- Heaters, Temperature Control
- Aluminum Extrusions, Framing, Support & Posts
- Casters, Leveling Mounts, Posts
- Doors, Cabinet Hardware
- Springs, Shock Absorbers
- Adjustment/Fastening Components, Pins, Magnets
- Antivibration, Soundproofing Materials, Safety Products
- Fasteners
- Materials
- Wiring Components
- LAN Cables / Industrial Network Cables
- Equipment Specific Cables
- Cordsets
- Computer & AV Cables
- Wire/Cable
- Connector (General Purpose)
- Crimp Terminal Components
- Cable Organization
- Cable Gland Components
- Cable Bushing/Clip/Sticker
- Screw/Spacer
- Cable accessories
- Tube
- Electrical Conduits
- Duct/Wiring
- Electrical Wiring Tools
- Dedicated tools
- Soldering supplies
- Electrical & Controls
- Cutting Tools
- Carbide End Mill
- HSS End Mill
- Concrete Drill Bits
- Milling Cutter Insert / Holder
- Core Drill Bits
- Customized Straight Blade End Mill
- Dedicated Cutter
- Crinkey Cutters
- Turning Tool
- Drill
- Cutting Tool Accessories
- Screw Hole Related Tools
- Reamer
- Electric Drill Bits
- Chamfering, Centering Tool
- Hole Saws
- Magnetic Drill Press Cutters
- Step Drills
- Wood Drills & Cutters
- Processing Tools
- packing & logistics storage supplies
- Safety Products
- research and development & cleanroom supplies
- Press Die Components
- Plastic Mold Components
- Ejector Pins
- Sleeves, Center Pins
- Core Pins
- Sprue bushings, Gates, and other components
- Date Mark Inserts, Recycle Mark Inserts, Pins with Gas Vent
- Undercut, Plates
- Leader Components, Components for Ejector Space
- Mold Opening Controllers
- Cooling or Heating Components
- Accessories, Others
- Components of Large Mold, Die Casting
- Injection Molding Components
- Purging Agent
- Injection Molding Machine Products
- Accessories of Equipment
- Auxiliary Equipment
- Air Nippers
- Air Cylinders
- Air Chuck for Runner
- Chuck Board Components
- Frames
- Suction Components
- Parallel Air Chuck
- Special Air Chuck
- Mold Maintenance
- Heating Items
- Heat Insulation Sheets
- Couplers, Plugs, One-touch Joints
- Tubes, Hoses, Peripheral Components
Applications
Brands

Please read before use
What is inCAD Library?
- Helpful application examples for mechanical engineers.
The Concept of inCAD Library
- Online application library with a range of ideas for all manufacturing industries.
- Save design time and learn new design applications when you are concepting new machines.
Disclaimer
- MISUMI may not offer all parts in each application design. Available parts can only be purchased separately not as a unit shown in each application design.
- MISUMI does not guarantee quality, accuracy, functionality, safety or reliability for the combination of the parts in each application example. Accept these points prior to use.
- 2014 Copyright MISUMI
- The data cannot be used for any purposes (including sales promotion) except for designing your machine.
- All associated CAD is free. Misumi reserves the right at its sole discretion to cancel, terminate or modify this offer.
- MISUMI may change, add or delete application examples posted without prior notice.
- MISUMI assumes no responsibilities for any damage incurred resulting from your use of the Service or any change, addition or deletion by MISUMI of the application examples for any reason whatsoever.
inCAD Library Features
- Get great new design ideas for these application examples.
- Find application examples quickly! Search by function, workpiece shape, etc.
- Download the CAD models for each application example.
Over 300 design application ideas
collected from dozens of industries!
Log in to download free CAD models.
Download CAD for the entire application example!
Good IDEA! button
Click the Good IDEA! Button when you like an application example!
*Can only be clicked once per application example.
- Upper right corner on the page of application example details
- Pop-up dialog for CAD data downloading
- inCAD Library Home
- > No.000184 Inspection Mechanism on Belt Conveyor
- The corresponding application example does not exist. Please input application example No. again for search.
No.000184 Inspection Mechanism on Belt Conveyor
Work piece positioning and rotating mechanism.
Relevant category


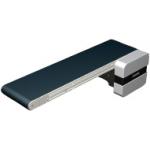
Flat Belt Conveyor Full Belt Type
| Product name | Flat Belt Conveyor Full Belt Type, End Drive, 2-Slot Frame (Pulley Dia. 30mm) |
|---|---|
| Part number | CVSFA-90-1000-25-T100-SCM-100-W-A |
Selection criteria
Suitable for selecting the ready-made product for automatic transfer.
Available sizes
■Flat Belt Conveyor Full Belt Type, End Drive, 2-Slot Frame (Pulley Dia. 30mm)
| Part | Material | Surface Treatment |
|---|---|---|
| Frame | Aluminum | Anodize |
| Motor Cover | Paint | |
| Pulley Holder | 5052 Aluminum Alloy | Anodize |
| 1018 Carbon Steel | Trivalent Chromate |
■Belt Specification
| Usage | Surface Material | Color Tone | Continuous Use Temperature °C |
|---|---|---|---|
| General Purpose | Polyurethane | Green | -10℃~80℃ |
| White | |||
| Sliding | Urethane Impregnated | Green | |
| White | |||
| Electronic Parts Conveyor | Conductive Polyurethane | Black | |
| Food Conveyor | Polyurethane | White | |
| Oil Resistant | Oil-Resistant Chloroethylene | Navy | 5℃~60℃ |
| Non-Adhesive | Polyurethane | White | -10℃~80℃ |
| No Belt | |||
■Sizes
| Belt Width (10 mm increments) | Distance between pulleys (5 mm increments) | Motor | |||
|---|---|---|---|---|---|
| Output (W) | Voltage (V) | Specifications | Gearhead Reduction Ratio | ||
| 60~300 | 280~2000 | 6、25 | * Note | 12.5, 15, 18, 25, 30, 36, 50, 60, 75, 90, 100, 120, 150, 180 | |
* Voltage and specification of a motor are varied with countries of sales.
Performance info.
■Conveying capacity of the conveyors (full belt single track, head drive φ30)

Technical Calculations
■Conveyor Selection Site

Urethane Rollers
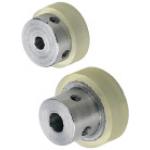
| Product name | Urethane Rollers - Set Screw Holes |
|---|---|
| Part number | UMHSH20-5 |
Selection criteria
Used as a mechanism that absorbs the shock of the work piece while rotating it.
Available sizes
■Urethane Rollers - Set Screw Holes
| Material | Hardness | |
|---|---|---|
| Core | Lining | |
| 304 Stainless Steel | Urethane | Shore A90, Shore A70, Shore A50 |
| 5052 Aluminum Alloy | ||
■Sizes and Dimensions
| Name No. | Roller O.D. | Shaft Bore Dia. | Core Material O.D. | Roller Width | Overall Length |
|---|---|---|---|---|---|
| 15 | φ15 | φ4 | φ10 | 6 | 12 |
| 15-5 | φ5 | ||||
| 20 | φ20 | φ4 | φ16 | 6 | 12 |
| 20-5 | φ5 | ||||
| 25 | φ25 | φ6 | φ16 | 8 | 20 |
| 25−8 | φ8 | ||||
| 30 | φ30 | φ6 | φ16 | 8 | 20 |
| 30−8 | φ8 | ||||
| 35 | φ35 | φ8 | φ20 | 10 | 25 |
| 35−10 | φ10 | ||||
| 40 | φ40 | φ8 | φ25 | 10 | 25 |
| 40−10 | φ10 | ||||
| 50 | φ50 | φ10 | φ30 | 10 | 25 |
| 50−12 | φ12 |
Accuracy Info
■Accuracy of Urethane Rollers (Set Screw Type)
Shaft Bore Dia. Tolerance: H7

Urethane Molded Bearings
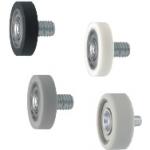
| Product name | Silicon Rubber / Urethane Molded Bearings - Flat, with Threaded Shaft |
|---|---|
| Part number | UMSWH8-28 |
Selection criteria
Suitable to rotate the work piece without damaging it.
Available sizes
■Silicon Rubber / Urethane Molded Bearings - Flat, with Threaded Shaft
| Tire Section | Bearing Material | Shaft | |||
|---|---|---|---|---|---|
| Material | Hardness | Color | Material | Surface Treatment | |
| Urethane | Shore A95 | Black | 52100 Bearing Steel | Carbon Steel | Electroless Nickel Plating |
| 440C Stainless Steel | 303 Stainless Steel | − | |||
| White | 52100 Bearing Steel | Carbon Steel | Trivalent Chromate | ||
| 440C Stainless Steel | 303 Stainless Steel | − | |||
| Shore A90 | Black | 52100 Bearing Steel | Carbon Steel | Electroless Nickel Plating | |
| 440C Stainless Steel | 303 Stainless Steel | − | |||
| White | 52100 Bearing Steel | Carbon Steel | Trivalent Chromate | ||
| 440C Stainless Steel | 303 Stainless Steel | − | |||
| Shore A70 | Black | 52100 Bearing Steel | Carbon Steel | Electroless Nickel Plating | |
| Shore A50 | Black | 52100 Bearing Steel | Carbon Steel | Electroless Nickel Plating | |
| White | 52100 Bearing Steel | Carbon Steel | Trivalent Chromate | ||
| Silicon Rubber | Shore A70 | Light Gray | 52100 Bearing Steel | Carbon Steel | Electroless Nickel Plating |
| 440C Stainless Steel | 303 Stainless Steel | − | |||
| Antistatic Urethane | Shore A90 | Gray | 52100 Bearing Steel | Carbon Steel | Electroless Nickel Plating |
■Sizes and Dimensions
| O.D. | Bearing | Screw Dia. (Coarse) | Thread Length | Roller Width |
|---|---|---|---|---|
| φ10 | W683ZZA | M3 | 4 | 3 |
| φ12 | ||||
| φ13 | W684AX50ZZ | M4 | 5 | 4 |
| φ16 | 624ZZ | 5 | ||
| WBC5−13ZZ | ||||
| φ20 | 625ZZ | |||
| 696ZZ | M6 | 8 | ||
| φ28 | 626ZZ | 6 | ||
| 608ZZ | 7 | |||
| φ30 | 608ZZ | |||
| 6000ZZ | 8 | |||
| φ40 | 6200ZZ | 9 | ||
| 6002ZZ | M10 | 12 | ||
| φ45 | 6202ZZ | 11 | ||
| 6904ZZ | 9 | |||
| φ55 | 6204ZZ | 14 | ||
| φ65 | 6205ZZ | 15 |
Performance info.
■Load capacity of urethane molded bearings threaded, with flat A-Shape
| O.D. | Bearing | Allowable Load N | ||||
|---|---|---|---|---|---|---|
| Urethane | Silicon | |||||
| Shore A95 | Shore A90 | Shore A70 | Shore A50 | Shore A70 | ||
| φ10 | W683ZZA | 38 | 28 | 9 | 4 | 7 |
| φ12 | 53 | 34 | 10 | 6 | 9.8 | |
| φ13 | W684AX50ZZ | 66 | 44 | 13 | 7 | 13 |
| φ16 | 624ZZ | 79 | 59 | 16 | 6 | 18 |
| WBC5−13ZZ | 79 | 16 | ||||
| φ20 | 625ZZ | 102 | 78 | 20 | 9 | 24 |
| 696ZZ | 114 | 23 | 15 | |||
| φ28 | 626ZZ | 218 | 157 | 44 | 39 | 47 |
| 608ZZ | 208 | 42 | 35 | |||
| φ30 | 608ZZ | − | 176 | 81 | 65 | 53 |
| 6000ZZ | 94 | 51 | ||||
| φ40 | 6200ZZ | − | 274 | 136 | 93 | 82 |
| 6002ZZ | 122 | 96 | ||||
| φ45 | 6202ZZ | − | 343 | 109 | 102 | 103 |
| 6904ZZ | 130 | 98 | ||||
| φ55 | 6204ZZ | − | 490 | 225 | 176 | 147 |
| φ65 | 6205ZZ | − | 750 | 333 | 250 | 226 |

IDEA NOTE Minimizes conveyor width.
By using a full belt type conveyor, the mechanism is structured with the minimum possible width with respect to the workpiece diameter.
-
 TERMS AND CONDITIONS FOR USE OF CAD DATA
-
Your access to the CAD data that MISUMI Corporation (hereinafter referred to as the Company) posts on this site (including 3D CAD data, intermediate 3D CAD data and 2D CAD data; hereinafter referred to as the Data) are of products manufactured and/or sold by the Company (hereinafter referred to as the Products) assumes that you have read and accepted these terms and conditions which govern your use of the Data. If you do not agree to these terms and conditions, you must stop using this website and the Data. You must not use the Data for any unlawful purpose or in any manner inconsistent with these terms and conditions.
- 1. CAD Data
- The Data is prepared for assisting the Company's users in the CAD design process by providing dimensions and other Product information. In order to provide the best speed and stability working within this site, the Product drawings were simplified to reduce the size of the Data. For instance, some of the Products are shown without the oil groove shape, screws or spring shape. Also, please be aware that the tolerance, surface roughness and/or chamfer of the Data may vary from the actual Products.
- 2. Disclaimer on Data
- While the Company has carefully prepared the Data, accuracy of the Data is not guaranteed and is subject to the variances as described above. The Company may also modify, add or delete the Data at any time without prior notice. The Company assumes no liability for any direct, indirect, consequential or special damages that you may claim resulted from your use of the Data or any changes to or deletions of the Data regardless of the reason. The Company provides no warranty as to the quality, accuracy, functionality, safety or reliability of the combination of Products and parts. Example applications and combinations of the Products are provided for illustrative purposes only.
- 3. Copyright
-
Copyrights to the content and the Data belong to the Company or the manufacturers of the Products. The said copyright is protected by the Copyright Act and international treaties. The use (including duplication, modification, uploading, posting, transmission, distribution, licensing, sales and publishing) of the Data except for the purpose to use the Data described above without prior approval of the Company is not allowed. The Data cannot be used for any purposes (including sales promotion) except for designing your machine. If you violate this provision or the laws or regulations, the Company may prohibit you from the use of the Data, the Company’s site and/or take legal action. So long as you comply with these terms and conditions, the Company grants to you a non-exclusive, non-transferable, revocable license to access and use the Data for the sole purpose of assisting you in designing machines that incorporate products.
In case that the CAD data is found to have been to be used for any purpose other than mentioned above or against the related laws, MISUMI may take legal actions, including the one for blocking the involved user from using CAD data and from accessing to the MISUMI site. - 4. Disclaimer of Warranty
- ANY AND ALL CONTENT APPEARING ON THIS WEB SITE IS PROVIDED FOR INFORMATIONAL PURPOSES ONLY. THIS WEB SITE, ITS CONTENT AND ITS LINKS ARE PROVIDED ON AN "AS IS" AND "AS AVAILABLE" BASIS AND ARE USED ONLY AT YOUR SOLE RISK, TO THE FULLEST EXTENT PERMISSIBLE BY LAW. THE COMPANY DISCLAIMS ALL WARRANTIES, EXPRESS OR IMPLIED, OF ANY KIND, REGARDING THIS WEB SITE (INCLUDING ITS CONTENT, HARDWARE, SOFTWARE AND LINKS), INCLUDING AS TO FITNESS FOR A PARTICULAR PURPOSE, MERCHANTABILITY, TITLE, NON INFRINGEMENT, RESULTS, ACCURACY, COMPLETENESS, ACCESSIBILITY, COMPATIBILITY, SECURITY AND FREEDOM FROM COMPUTER VIRUS. THE COMPANY WILL NOT BE LIABLE FOR ANY DAMAGES OR LOSSES, INCLUDING DIRECT, INDIRECT, CONSEQUENTIAL, SPECIAL, INCIDENTAL OR PUNITIVE DAMAGES AND/OR LOST PROFITS, IN CONNECTION WITH USE OF THE INTERNET, THIS WEB SITE, ITS CONTENT OR ITS LINKS
Further, the Company will not be liable to you for any failure or delay by the Company to provide access to the Data or any of its obligations under these terms and conditions where such failure or delay is the direct or indirect result of any circumstances beyond the Company's reasonable control (and the Company's obligations will be suspended for the duration of such circumstances). - 5. Policy of Third Parties
- You may be required to separately agree to third party's policies if you use third party software to create or browse the Data or use a third party’s CAD data. In this case, the Company does not assume any responsibility for defects of such CAD data or the software of the third party or violation of their rights. Understand them before use.
CAD Download (Unit Assembly)
CAD Download: File FormatThank you for downloading the data.
Click the Good IDEA! button when you find interesting design tips.
This data is utilized in order to list more useful application examples in the future.
CAD Data Limitations
-
Assembly data shows the assembly drawings in the concept design phase. The sole purpose of the data is to explain the structure and functionality of the assembly and is not considered nor to be used as a final design.
You will need to edit the Data so that it meets your specific design conditions. -
Unit assembly Data consists of some sub-assemblies.
It is configured so that each sub-assembly unit can be used as it is or edited. - The Data for fabricated parts is based on easy-to-edit dimensions and shapes in sketches and histories.
- The Data including the third-part components are made by the Company.
* The part in the frame is a sub-assembly unit.
-
Your access to the CAD data that MISUMI Corporation (hereinafter referred to as the Company) posts on this site (including 3D CAD data, intermediate 3D CAD data and 2D CAD data; hereinafter referred to as the Data) are of products manufactured and/or sold by the Company (hereinafter referred to as the Products) assumes that you have read and accepted these terms and conditions which govern your use of the Data. If you do not agree to these terms and conditions, you must stop using this website and the Data. You must not use the Data for any unlawful purpose or in any manner inconsistent with these terms and conditions.
-

- * Unit assembly Data consists of some sub-assemblies.
It is configured so that each sub-assembly unit can be used as it is or edited.
Application Overview
Purpose
- Purpose
- To inspect defect on resin case.
- Operation
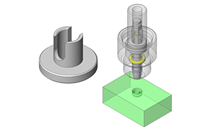
- To detect a work piece as it is transferred via a conveyor to a determined inspection position. Positioning is performed as a pusher presses a urethane roller against the drive roller. After positioning, the drive roller is rotated and the work piece appearance is conducted, After inspection, the pusher is retracted and the conveyor moves the workpiece from the inspection position.
Points for use
- Automated manufacturing line.
Target workpiece
- Pallet
- Shape: cylindrical pallet
- Size: φ90 x H30mm
- Workpiece
- Shape: resin plate
- Size: W65xD8xH130mm
Design Specifications
Operating Conditions or Design Requirements
- Rotation speed during inspection: 12rpm
- Outer dimensions:W1032xD372xH183mm
Required Performance
- Positional repeatability:±0.5mm
Selection Criteria for Main Components
- Base on the required work piece rotational speed of 12rpm, a motor with a range of 280 to 2800rpm and a gear reduction ratio of 1/100 are selected.
Design Evaluation
Verification of main components
- Motor rotation speed, work piece rotation speed, cylindrical force, and overhang load are all verified.
- Conditional value: workpiece rotation speed N = 12rpm, motor rotation speed R = 280 to 2800rpm, motor output T0 = 0.005N·m,
gear head reduction ratio i = 1/100, gear head allowable overhang load Q0 = 620N·mm,
distance from motor mounting face to roller load position L = 17mm, robot cylinder maximum push force Fi = 44N,
friction coefficient μ = 0.6 (metal and rubber), workpiece diameter D1 = 90mm, drive roller diameter D2 = 50mm - If we put D1 as workpiece diameter, D2 as drive roller diameter, and N as workpiece rotation speed, and Q as gear head rotation speed,
N/Q = D2/D1, hence, Q = N x (D1/D2) = 12 x (90/50) = 21.6rpm - From rotation speed Q1 of gear head shaft with reduction ratio i: Q1 = R x i , Q1 = 2.8 to 28rpm
Therefore, the motor rotation speed satisfies the needs. - Motor torque T with reduction ratio i: T = T0 x i = 0.5N·m
As the motor torque and the drive roller torque are equal, if we put P as force at drive roller outer diameter,
T=P×(D2/2)
Hence, P = T x (2/D2) = 0.5 x {2/(50 x 10⁻³)} = 20N - From push force of robot cylinder applied to roller: F = Fi x μ, F = 44 x 0.6 = 26.4N
As F > P, the push force is suitable. - From allowable overhang load at load position: Q = Q0/L, Q = 620/17 = 36.5N
As Q > F, the overhang load is within the allowable range.
- Conditional value: workpiece rotation speed N = 12rpm, motor rotation speed R = 280 to 2800rpm, motor output T0 = 0.005N·m,
Other Design Consideration
- As a cylindrical work piece is positioned using two rollers, the accuracy of the conveyor does not need to be high.
- As the device does not use air pressure, an electric cylinder is used.
Explore Similar Application Examples
-
Relevant category
-
Relevant category
-
Relevant category
About This Website
Contact us Monday to Friday: 8:00 am to 6:00 pm (Mexico City time)
- Contact Information
- Contact Us
Copyright © MISUMI Corporation All Rights Reserved.


