(!)Due to Microsoft's end of support for Internet Explorer 11 on 15/06/2022, this site does not support the recommended environment.

ideanote
inCAD Library

Please read before use

What is inCAD Library?

  • Helpful application examples for mechanical engineers.

The Concept of inCAD Library

  • Online application library with a range of ideas for all manufacturing industries.
  • Save design time and learn new design applications when you are concepting new machines.

Disclaimer

  • MISUMI may not offer all parts in each application design. Available parts can only be purchased separately not as a unit shown in each application design.
  • MISUMI does not guarantee quality, accuracy, functionality, safety or reliability for the combination of the parts in each application example. Accept these points prior to use.
  • 2014 Copyright MISUMI
  • The data cannot be used for any purposes (including sales promotion) except for designing your machine.
  • All associated CAD is free. Misumi reserves the right at its sole discretion to cancel, terminate or modify this offer.
  • MISUMI may change, add or delete application examples posted without prior notice.
  • MISUMI assumes no responsibilities for any damage incurred resulting from your use of the Service or any change, addition or deletion by MISUMI of the application examples for any reason whatsoever.

inCAD Library Features

  1. Get great new design ideas for these application examples.
  2. Over 300 design application ideas
    collected from dozens of industries!

  3. Find application examples quickly! Search by function, workpiece shape, etc.

  4. Download the CAD models for each application example.
  5. Log in to download free CAD models.
    Download CAD for the entire application example!

Good IDEA! button

Click the Good IDEA! Button when you like an application example!

*Can only be clicked once per application example.

  • Upper right corner on the page of application example details

  • Pop-up dialog for CAD data downloading

Page top

Keyword Search
No. Search
SNS: 

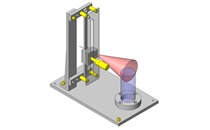
No.000114 Adjustable Claw Mechanism

Chuck with different opening and closing angles.

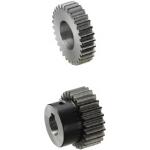
Induction Hardened Gears

Product name Induction Hardened Spur Gears - Pressure Angle 20Deg
Part number GEAKBH1.0-24-8-B-10N-KC90
Features Gears with hardened teeth which provides excellent strength, abrasion resistance and high precision
* Orange colored cells in the table below indicate the part numbers used in this example.

Selection criteria

Suitable for areas requiring abrasion resistance.

Back to page top.

Available sizes

■Induction Hardened Spur Gears - Pressure Angle 20Deg

Material Surface Treatment Hardness Accessory
1045 Carbon Steel Black Oxide Tooth Induction Hardened 51 - 55 HRC
(depth 1 mm or more)
Set Screw
(4137 Alloy Steel Black Oxide)

■Sizes and Dimensions.

Module Number of Teeth Shaft Bore DIA.
(1 mm increment)
Round Hole,
Round Hole + Tap
Keyway,
Keyway + Tap
1.0 18 6-10
20 6-11 8・10
22 8-14 8-12
24
25
26
28
30 10-17 10-15
32
35
36
40 10-21 10-18
45
48
50 12-24 12-18
60 12-28 12-25
70
80 15-35 15-30
100
1.5 15 10-12 10
16 10-13 10・11
18 10-15 10-13
20 10-16 10-14
24 12-19 12-17
25 12-21 12-18
26 12-22 12-19
28 15-25 15-19
30 15-26 15-23
32 15-28 15-24
35 15-29 15-26
36 15-31 15-28
40 15-35 15-31
45 18-35 18-31
48
50 18-42 18-38
60 20-42 20-38
70
Gear specifications Shaft Bore Specs. 
Straight Bore Straight Bore
+Tap
Keyway Keyway
+Tap
No hub
With Hub

Back to page top.

Accuracy Info

■Accuracy of Spur Gear.

Gear accuracy: Previous JIS B 1702 4 Class (New JIS B 1702-1 - 8 class equivalent).
Shaft Bore Dia. Tolerance:  H7.

Back to page top.

Small Ball Bearings

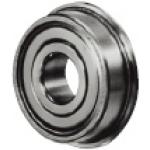
Product name Small Deep Groove Ball Bearings - Double Shielded with Flange, Stainless Steel
Part number SFL698ZZ
* Orange colored cells in the table below indicate the part numbers used in this example.

Selection criteria

Simplifies the housing of the bearings.

Back to page top.

Available sizes

■Small Deep Groove Ball Bearings - Double Shielded with Flange, Stainless Steel

Shaft bore DIA. (mm) O.D.(mm) Thickness(mm)
5 8 2.5
11 5
13 4
14 5
16
6 10 3
13 5
15
17 6
19
8 12 3.5
16 5
19 6
22 7
10 15 4
19 5
22 6
12 18 4
24 6

Back to page top.

Performance info.

■Speeds
Loads (Load Info.) of Flanged Bearings.

Shaft bore DIA. (mm) O.D. (mm) Basic Load Rating
Basic Dynamic Load Rating (N) Basic Static Load Rating (N)
5 8 185 72
11 607 225
13 915 344
14 1105 404
16 1469 536
6 10 421 174
13 918 352
15 1139 418
17 1921 668
19 1985 708
8 12 462 219
16 1368 568
19 1901 728
22 2799 1103
10 15 684 348
19 1459 672
22 2156 1018
12 18 787 424
24 2453 1173

Back to page top.

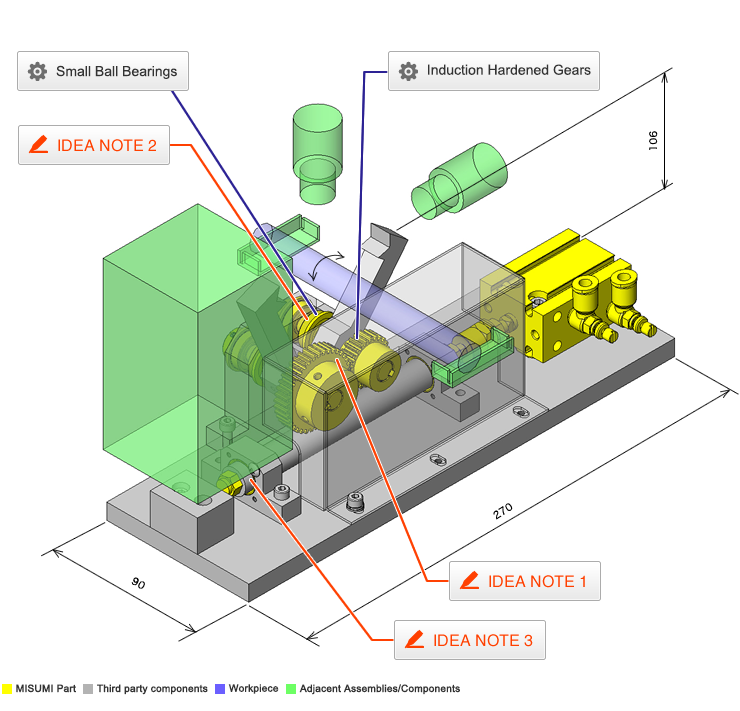
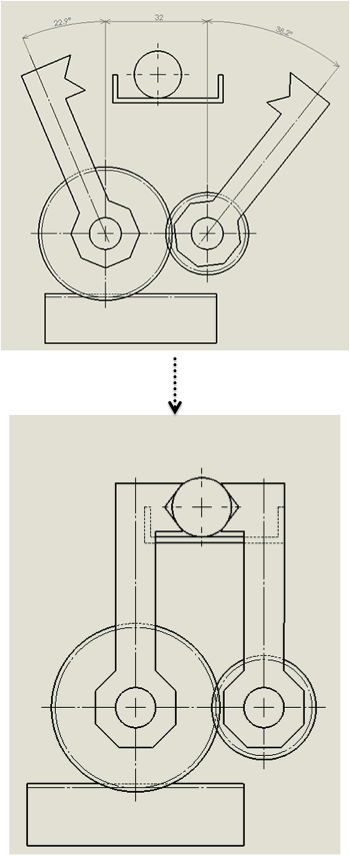
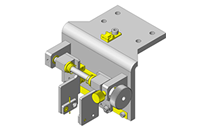
IDEA NOTE Chuck mechanism utilizing gears

By using gears with different numbers of teeth to rotate the chuck, different opening and closing angles between the arms are achieved.

IDEA NOTE Flanged bearings are utilized on the work hand rotary shafts.

By fitting flanged bearings in the through holes without machining the bearing housing with steps, rotary bearing mechanisms that press the shafts from both sides are achieved. To prevent excessive push by the shaft collars, spacers are added on the central inner ring side.

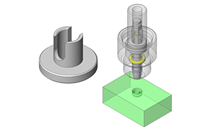
IDEA NOTE Secure oil free bushings

Secure the oil free bushings with truss screws to reduce cost.

  • TERMS AND CONDITIONS FOR USE OF CAD DATA
    Your access to the CAD data that MISUMI Corporation (hereinafter referred to as the Company) posts on this site (including 3D CAD data, intermediate 3D CAD data and 2D CAD data; hereinafter referred to as the Data) are of products manufactured and/or sold by the Company (hereinafter referred to as the Products) assumes that you have read and accepted these terms and conditions which govern your use of the Data. If you do not agree to these terms and conditions, you must stop using this website and the Data. You must not use the Data for any unlawful purpose or in any manner inconsistent with these terms and conditions.
    1. CAD Data
    The Data is prepared for assisting the Company's users in the CAD design process by providing dimensions and other Product information. In order to provide the best speed and stability working within this site, the Product drawings were simplified to reduce the size of the Data. For instance, some of the Products are shown without the oil groove shape, screws or spring shape. Also, please be aware that the tolerance, surface roughness and/or chamfer of the Data may vary from the actual Products.
    2. Disclaimer on Data
    While the Company has carefully prepared the Data, accuracy of the Data is not guaranteed and is subject to the variances as described above. The Company may also modify, add or delete the Data at any time without prior notice. The Company assumes no liability for any direct, indirect, consequential or special damages that you may claim resulted from your use of the Data or any changes to or deletions of the Data regardless of the reason. The Company provides no warranty as to the quality, accuracy, functionality, safety or reliability of the combination of Products and parts. Example applications and combinations of the Products are provided for illustrative purposes only.
    3. Copyright
    Copyrights to the content and the Data belong to the Company or the manufacturers of the Products. The said copyright is protected by the Copyright Act and international treaties. The use (including duplication, modification, uploading, posting, transmission, distribution, licensing, sales and publishing) of the Data except for the purpose to use the Data described above without prior approval of the Company is not allowed. The Data cannot be used for any purposes (including sales promotion) except for designing your machine. If you violate this provision or the laws or regulations, the Company may prohibit you from the use of the Data, the Company’s site and/or take legal action. So long as you comply with these terms and conditions, the Company grants to you a non-exclusive, non-transferable, revocable license to access and use the Data for the sole purpose of assisting you in designing machines that incorporate products.
    In case that the CAD data is found to have been to be used for any purpose other than mentioned above or against the related laws, MISUMI may take legal actions, including the one for blocking the involved user from using CAD data and from accessing to the MISUMI site.
    4. Disclaimer of Warranty
    ANY AND ALL CONTENT APPEARING ON THIS WEB SITE IS PROVIDED FOR INFORMATIONAL PURPOSES ONLY. THIS WEB SITE, ITS CONTENT AND ITS LINKS ARE PROVIDED ON AN "AS IS" AND "AS AVAILABLE" BASIS AND ARE USED ONLY AT YOUR SOLE RISK, TO THE FULLEST EXTENT PERMISSIBLE BY LAW. THE COMPANY DISCLAIMS ALL WARRANTIES, EXPRESS OR IMPLIED, OF ANY KIND, REGARDING THIS WEB SITE (INCLUDING ITS CONTENT, HARDWARE, SOFTWARE AND LINKS), INCLUDING AS TO FITNESS FOR A PARTICULAR PURPOSE, MERCHANTABILITY, TITLE, NON INFRINGEMENT, RESULTS, ACCURACY, COMPLETENESS, ACCESSIBILITY, COMPATIBILITY, SECURITY AND FREEDOM FROM COMPUTER VIRUS. THE COMPANY WILL NOT BE LIABLE FOR ANY DAMAGES OR LOSSES, INCLUDING DIRECT, INDIRECT, CONSEQUENTIAL, SPECIAL, INCIDENTAL OR PUNITIVE DAMAGES AND/OR LOST PROFITS, IN CONNECTION WITH USE OF THE INTERNET, THIS WEB SITE, ITS CONTENT OR ITS LINKS
    Further, the Company will not be liable to you for any failure or delay by the Company to provide access to the Data or any of its obligations under these terms and conditions where such failure or delay is the direct or indirect result of any circumstances beyond the Company's reasonable control (and the Company's obligations will be suspended for the duration of such circumstances).
    5. Policy of Third Parties
    You may be required to separately agree to third party's policies if you use third party software to create or browse the Data or use a third party’s CAD data. In this case, the Company does not assume any responsibility for defects of such CAD data or the software of the third party or violation of their rights. Understand them before use.

    CAD Download (Unit Assembly)

    CAD Download: File Format
    生成

    Thank you for downloading the data.

    Click the Good IDEA! button when you find interesting design tips.


    This data is utilized in order to list more useful application examples in the future.

    CAD Data Limitations

    1. Assembly data shows the assembly drawings in the concept design phase. The sole purpose of the data is to explain the structure and functionality of the assembly and is not considered nor to be used as a final design.
      You will need to edit the Data so that it meets your specific design conditions.
    2. Unit assembly Data consists of some sub-assemblies.
      It is configured so that each sub-assembly unit can be used as it is or edited.
    3. * The part in the frame is a sub-assembly unit.

    4. The Data for fabricated parts is based on easy-to-edit dimensions and shapes in sketches and histories.
    5. The Data including the third-part components are made by the Company.

    Page top

  • * Unit assembly Data consists of some sub-assemblies.
       It is configured so that each sub-assembly unit can be used as it is or edited.

Application Overview

Purpose

  • [Purpose]
    To position oddly shaped work pieces and conduct appearance inspection.
  • [Operation]
    When the opening of one side of the chuck is restricted, the work piece can still be held by opening the chuck at different angles.

Target workpiece

  • Shape: cylindrical/resin pin.
     size:φ14.8xL132mm.
     weight: 40g.

Design Specifications

Operating Conditions or Design Requirements

  • Arm angle: arm (large gear): 22.9°.
    Arm (small gear): 38.2 °.
  • Outer dimensions: W270 x D90 x H106mm.

Required Performance

  • Positioning accuracy ±0.1mm

Selection Criteria for Main Components

  • A spur gear with a module: m= 1.0 is selected as it satisfies the requirements for the effective diameter of the large gear Sa=40 and the small gear Sb=24.
  • A cylinder with a gripping force P=24N is selected with a diameter of 20mm.

Design Evaluation

Verification of main components

  • Whether the cylinder thrust produces the required gripping force during chucking is verified below.
  • Confirmation of the gripping force of the whole device
    • Conditional value: cylinder operating pressure = 0.5MPa, output on cylinder push side F = 157N.
    • Effective diameter of large gear connected to cylinder Sa = 40mm.
    • Effective diameter of small gear: Sb = 24mm.
    • Chuck position L: rotation center to 50mm.
    • Efficiency of whole device: η = 0.85.
    • Force of chuck on large gear side: Fa = (F x Sa/2)/L = 62.8N.
    • Force of chuck on small gear side: Fb = (F x Sb/2)/L = 37.68N.
    • As Fa > Fb, Fb is applied to the formula below to calculate the gripping force of the whole device.
    • Gripping force of the whole device P = Fb x η = 32N.

Other Design Consideration

  • The position of work hard can be adjusted using the cylinder joint.

Explore Similar Application Examples

Page - / -

Part List

No. Part Name Sample Picture MISUMI Part Number
For Price and Days to ship click on Part No.
Quantity
1 Air Cylinders MSCFA20-10 1
2 Floating Connector FLCM6-1.0 1
3 Flow Rate Control Valves SPSNL6-M5 2
4 Oil Free Bushings MPBZU15-12 2
5 Stop Pins USSTEH10 1
6 Super Gear GEAKBH1.0-24-8-B-10N-KC90 1
7 Induction Hardened Spur Gears GEAKBH1.0-40-8-B-10N-KC90 1
8 Rotary Shaft SSFRHP10-40-F25-P8-KC4-A36 2
9 Parallel Keys KESS3-8 4
10 Deep Groove Ball Bearings SFL698ZZ 4
11 Shaft Collars PSCBRJ8-12 2
12 Shims CIMSS15-0.5 2
  • The part list above only contains MISUMI parts.
    Part list download (CSV) includes MISUMI and third party components used in this example.
  • TERMS AND CONDITIONS FOR USE OF CAD DATA
    Your access to the CAD data that MISUMI Corporation (hereinafter referred to as the Company) posts on this site (including 3D CAD data, intermediate 3D CAD data and 2D CAD data; hereinafter referred to as the Data) are of products manufactured and/or sold by the Company (hereinafter referred to as the Products) assumes that you have read and accepted these terms and conditions which govern your use of the Data. If you do not agree to these terms and conditions, you must stop using this website and the Data. You must not use the Data for any unlawful purpose or in any manner inconsistent with these terms and conditions.
    1. CAD Data
    The Data is prepared for assisting the Company's users in the CAD design process by providing dimensions and other Product information. In order to provide the best speed and stability working within this site, the Product drawings were simplified to reduce the size of the Data. For instance, some of the Products are shown without the oil groove shape, screws or spring shape. Also, please be aware that the tolerance, surface roughness and/or chamfer of the Data may vary from the actual Products.
    2. Disclaimer on Data
    While the Company has carefully prepared the Data, accuracy of the Data is not guaranteed and is subject to the variances as described above. The Company may also modify, add or delete the Data at any time without prior notice. The Company assumes no liability for any direct, indirect, consequential or special damages that you may claim resulted from your use of the Data or any changes to or deletions of the Data regardless of the reason. The Company provides no warranty as to the quality, accuracy, functionality, safety or reliability of the combination of Products and parts. Example applications and combinations of the Products are provided for illustrative purposes only.
    3. Copyright
    Copyrights to the content and the Data belong to the Company or the manufacturers of the Products. The said copyright is protected by the Copyright Act and international treaties. The use (including duplication, modification, uploading, posting, transmission, distribution, licensing, sales and publishing) of the Data except for the purpose to use the Data described above without prior approval of the Company is not allowed. The Data cannot be used for any purposes (including sales promotion) except for designing your machine. If you violate this provision or the laws or regulations, the Company may prohibit you from the use of the Data, the Company’s site and/or take legal action. So long as you comply with these terms and conditions, the Company grants to you a non-exclusive, non-transferable, revocable license to access and use the Data for the sole purpose of assisting you in designing machines that incorporate products.
    In case that the CAD data is found to have been to be used for any purpose other than mentioned above or against the related laws, MISUMI may take legal actions, including the one for blocking the involved user from using CAD data and from accessing to the MISUMI site.
    4. Disclaimer of Warranty
    ANY AND ALL CONTENT APPEARING ON THIS WEB SITE IS PROVIDED FOR INFORMATIONAL PURPOSES ONLY. THIS WEB SITE, ITS CONTENT AND ITS LINKS ARE PROVIDED ON AN "AS IS" AND "AS AVAILABLE" BASIS AND ARE USED ONLY AT YOUR SOLE RISK, TO THE FULLEST EXTENT PERMISSIBLE BY LAW. THE COMPANY DISCLAIMS ALL WARRANTIES, EXPRESS OR IMPLIED, OF ANY KIND, REGARDING THIS WEB SITE (INCLUDING ITS CONTENT, HARDWARE, SOFTWARE AND LINKS), INCLUDING AS TO FITNESS FOR A PARTICULAR PURPOSE, MERCHANTABILITY, TITLE, NON INFRINGEMENT, RESULTS, ACCURACY, COMPLETENESS, ACCESSIBILITY, COMPATIBILITY, SECURITY AND FREEDOM FROM COMPUTER VIRUS. THE COMPANY WILL NOT BE LIABLE FOR ANY DAMAGES OR LOSSES, INCLUDING DIRECT, INDIRECT, CONSEQUENTIAL, SPECIAL, INCIDENTAL OR PUNITIVE DAMAGES AND/OR LOST PROFITS, IN CONNECTION WITH USE OF THE INTERNET, THIS WEB SITE, ITS CONTENT OR ITS LINKS
    Further, the Company will not be liable to you for any failure or delay by the Company to provide access to the Data or any of its obligations under these terms and conditions where such failure or delay is the direct or indirect result of any circumstances beyond the Company's reasonable control (and the Company's obligations will be suspended for the duration of such circumstances).
    5. Policy of Third Parties
    You may be required to separately agree to third party's policies if you use third party software to create or browse the Data or use a third party’s CAD data. In this case, the Company does not assume any responsibility for defects of such CAD data or the software of the third party or violation of their rights. Understand them before use.

    CAD Download (Unit Assembly)

    CAD Download: File Format
    生成

    Thank you for downloading the data.

    Click the Good IDEA! button when you find interesting design tips.


    This data is utilized in order to list more useful application examples in the future.

    CAD Data Limitations

    1. Assembly data shows the assembly drawings in the concept design phase. The sole purpose of the data is to explain the structure and functionality of the assembly and is not considered nor to be used as a final design.
      You will need to edit the Data so that it meets your specific design conditions.
    2. Unit assembly Data consists of some sub-assemblies.
      It is configured so that each sub-assembly unit can be used as it is or edited.
    3. * The part in the frame is a sub-assembly unit.

    4. The Data for fabricated parts is based on easy-to-edit dimensions and shapes in sketches and histories.
    5. The Data including the third-part components are made by the Company.

    Page top

Page top