(!)Due to Microsoft's end of support for Internet Explorer 11 on 15/06/2022, this site does not support the recommended environment.

ideanote
inCAD Library

Please read before use

What is inCAD Library?

  • Helpful application examples for mechanical engineers.

The Concept of inCAD Library

  • Online application library with a range of ideas for all manufacturing industries.
  • Save design time and learn new design applications when you are concepting new machines.

Disclaimer

  • MISUMI may not offer all parts in each application design. Available parts can only be purchased separately not as a unit shown in each application design.
  • MISUMI does not guarantee quality, accuracy, functionality, safety or reliability for the combination of the parts in each application example. Accept these points prior to use.
  • 2014 Copyright MISUMI
  • The data cannot be used for any purposes (including sales promotion) except for designing your machine.
  • All associated CAD is free. Misumi reserves the right at its sole discretion to cancel, terminate or modify this offer.
  • MISUMI may change, add or delete application examples posted without prior notice.
  • MISUMI assumes no responsibilities for any damage incurred resulting from your use of the Service or any change, addition or deletion by MISUMI of the application examples for any reason whatsoever.

inCAD Library Features

  1. Get great new design ideas for these application examples.
  2. Over 300 design application ideas
    collected from dozens of industries!

  3. Find application examples quickly! Search by function, workpiece shape, etc.

  4. Download the CAD models for each application example.
  5. Log in to download free CAD models.
    Download CAD for the entire application example!

Good IDEA! button

Click the Good IDEA! Button when you like an application example!

*Can only be clicked once per application example.

  • Upper right corner on the page of application example details

  • Pop-up dialog for CAD data downloading

Page top

Keyword Search
No. Search
SNS: 

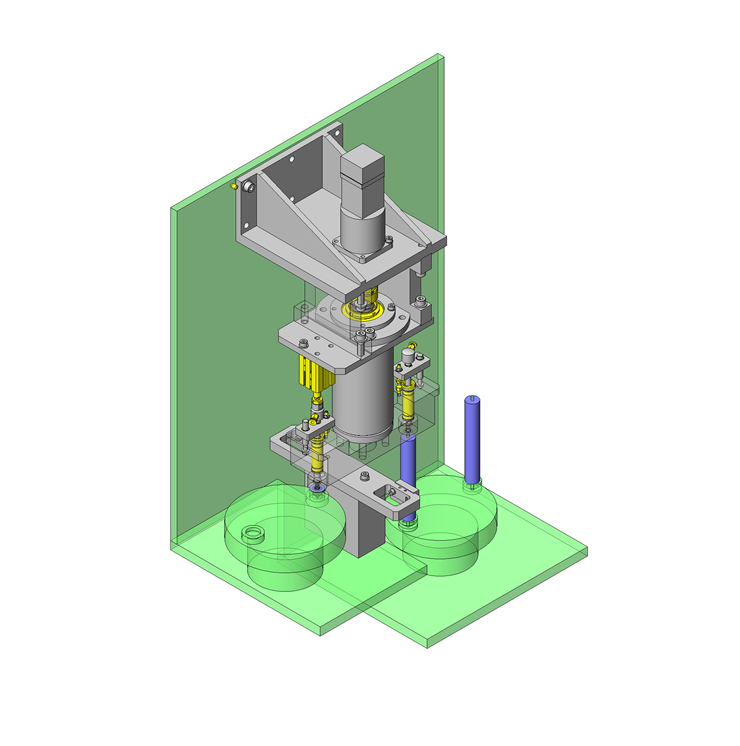
No.000209 Transfer and Press Mechanism

Transfers and press-fits small parts.

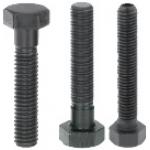
Stopper Bolts

Product name Stopper Bolts- Hexagon Socket, Fine Thread
Part number STRC4-25
* Orange colored cells in the table below indicate the part numbers used in this example.

Selection criteria

Suitable for economical positioning/securing components

Back to page top

Available sizes

■Stopper Bolts- Hexagon Socket, Fine Thread

Material Hardness Surface Treatment
4137 Alloy Steel 40-45HRC Black Oxide
Electroless Nickel Plating
410 Stainless Steel

■Sizes and Dimensions

Screw Dia.
(Coarse)
Screw Dia.
(Fine)
Length in
5mm increments
M3x0.5 10-30
M4x0.7 M4x0.5 15-60
M5x0.8 M5x0.5 15-60
M6x0.75 M6x0.75 20-60
M8x1.25 M8x0.75 25-60
M10x1.5 M10x1.0 30-70
M12x1.75 M12x1.0 35-80

Back to page top

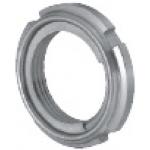
Fine U Nut

Product name Fine U Nuts
Part number FUNT30
* Orange colored cells in the table below indicate the part numbers used in this example.

Selection criteria

Determines the thrust direction position for bearings.

Back to page top

Available sizes

■Fine U Nuts

Material
Main Body Friction Ring
1018 Carbon Steel 301 Stainless Steel
1045 Carbon Steel Thermal Refined
(22 - 28HRC)
304 Stainless Steel

■Sizes and Dimensions

Thread Dia. Thread Dia. x Pitch O.D. (mm)
M8 M8x0.75 16
M10 M10x0.75 18
M12 M12x1.0 22
M15 M15x1.0 25
M17 M17x1.0 28
M20 M20x1.0 32
M25 M25x1.5 38
M30 M30x1.5 45
M35 M35x1.5 52
M40 M40x1.5 58
M45 M45x1.5 65
M50 M50x1.5 70

Back to page top

Accuracy Info

■Accuracy of Fine U Nuts

Perpendicularity of End Face (Max.): 0.05

Back to page top

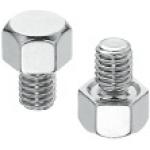
Stop Pin

Product name Stop Pins- Screw Type, T Standard
Part number STEHN7
* Orange colored cells in the table below indicate the part numbers used in this example.

Selection criteria

Suitable as a stopper pin

Back to page top

Available sizes

■Stop Pins- Screw Type, T Standard

Material Hardness Surface Treatment
Head Height Fixed Head Height Configurable
4137 Alloy Steel 46-50HRC 32-38HRC Electroless Nickel Plating
440C Stainless Steel 50-55HRC 40-45HRC -

■Sizes and Dimensions

Opposite Side
(mm)
Thickness (mm)
Fixed 0.5mm increments
5.5A 3 5.0~30.0
5.5 5
7
8
10 5.0~30.0
10B 8
13 5
13A 8
13B
14 5
14A 8
14B
17 5 5.0~30.0
17A 8
17B
19 5
19A 8
19B

Back to page top

Accuracy Info

■Accuracy of Stop Pin

Thickness Tolerance (mm): +0.01
                       0

Back to page top

IDEA NOTE Workpiece separation

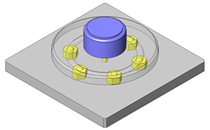
To prevent thin workpieces from overlapping, a separation plate is installed in the middle of the transfer path to the press-fitting part.

  • TERMS AND CONDITIONS FOR USE OF CAD DATA
    Your access to the CAD data that MISUMI Corporation (hereinafter referred to as the Company) posts on this site (including 3D CAD data, intermediate 3D CAD data and 2D CAD data; hereinafter referred to as the Data) are of products manufactured and/or sold by the Company (hereinafter referred to as the Products) assumes that you have read and accepted these terms and conditions which govern your use of the Data. If you do not agree to these terms and conditions, you must stop using this website and the Data. You must not use the Data for any unlawful purpose or in any manner inconsistent with these terms and conditions.
    1. CAD Data
    The Data is prepared for assisting the Company's users in the CAD design process by providing dimensions and other Product information. In order to provide the best speed and stability working within this site, the Product drawings were simplified to reduce the size of the Data. For instance, some of the Products are shown without the oil groove shape, screws or spring shape. Also, please be aware that the tolerance, surface roughness and/or chamfer of the Data may vary from the actual Products.
    2. Disclaimer on Data
    While the Company has carefully prepared the Data, accuracy of the Data is not guaranteed and is subject to the variances as described above. The Company may also modify, add or delete the Data at any time without prior notice. The Company assumes no liability for any direct, indirect, consequential or special damages that you may claim resulted from your use of the Data or any changes to or deletions of the Data regardless of the reason. The Company provides no warranty as to the quality, accuracy, functionality, safety or reliability of the combination of Products and parts. Example applications and combinations of the Products are provided for illustrative purposes only.
    3. Copyright
    Copyrights to the content and the Data belong to the Company or the manufacturers of the Products. The said copyright is protected by the Copyright Act and international treaties. The use (including duplication, modification, uploading, posting, transmission, distribution, licensing, sales and publishing) of the Data except for the purpose to use the Data described above without prior approval of the Company is not allowed. The Data cannot be used for any purposes (including sales promotion) except for designing your machine. If you violate this provision or the laws or regulations, the Company may prohibit you from the use of the Data, the Company’s site and/or take legal action. So long as you comply with these terms and conditions, the Company grants to you a non-exclusive, non-transferable, revocable license to access and use the Data for the sole purpose of assisting you in designing machines that incorporate products.
    In case that the CAD data is found to have been to be used for any purpose other than mentioned above or against the related laws, MISUMI may take legal actions, including the one for blocking the involved user from using CAD data and from accessing to the MISUMI site.
    4. Disclaimer of Warranty
    ANY AND ALL CONTENT APPEARING ON THIS WEB SITE IS PROVIDED FOR INFORMATIONAL PURPOSES ONLY. THIS WEB SITE, ITS CONTENT AND ITS LINKS ARE PROVIDED ON AN "AS IS" AND "AS AVAILABLE" BASIS AND ARE USED ONLY AT YOUR SOLE RISK, TO THE FULLEST EXTENT PERMISSIBLE BY LAW. THE COMPANY DISCLAIMS ALL WARRANTIES, EXPRESS OR IMPLIED, OF ANY KIND, REGARDING THIS WEB SITE (INCLUDING ITS CONTENT, HARDWARE, SOFTWARE AND LINKS), INCLUDING AS TO FITNESS FOR A PARTICULAR PURPOSE, MERCHANTABILITY, TITLE, NON INFRINGEMENT, RESULTS, ACCURACY, COMPLETENESS, ACCESSIBILITY, COMPATIBILITY, SECURITY AND FREEDOM FROM COMPUTER VIRUS. THE COMPANY WILL NOT BE LIABLE FOR ANY DAMAGES OR LOSSES, INCLUDING DIRECT, INDIRECT, CONSEQUENTIAL, SPECIAL, INCIDENTAL OR PUNITIVE DAMAGES AND/OR LOST PROFITS, IN CONNECTION WITH USE OF THE INTERNET, THIS WEB SITE, ITS CONTENT OR ITS LINKS
    Further, the Company will not be liable to you for any failure or delay by the Company to provide access to the Data or any of its obligations under these terms and conditions where such failure or delay is the direct or indirect result of any circumstances beyond the Company's reasonable control (and the Company's obligations will be suspended for the duration of such circumstances).
    5. Policy of Third Parties
    You may be required to separately agree to third party's policies if you use third party software to create or browse the Data or use a third party’s CAD data. In this case, the Company does not assume any responsibility for defects of such CAD data or the software of the third party or violation of their rights. Understand them before use.

    CAD Download (Unit Assembly)

    CAD Download: File Format
    生成

    Thank you for downloading the data.

    Click the Good IDEA! button when you find interesting design tips.


    This data is utilized in order to list more useful application examples in the future.

    CAD Data Limitations

    1. Assembly data shows the assembly drawings in the concept design phase. The sole purpose of the data is to explain the structure and functionality of the assembly and is not considered nor to be used as a final design.
      You will need to edit the Data so that it meets your specific design conditions.
    2. Unit assembly Data consists of some sub-assemblies.
      It is configured so that each sub-assembly unit can be used as it is or edited.
    3. * The part in the frame is a sub-assembly unit.

    4. The Data for fabricated parts is based on easy-to-edit dimensions and shapes in sketches and histories.
    5. The Data including the third-part components are made by the Company.

    Page top

  • * Unit assembly Data consists of some sub-assemblies.
       It is configured so that each sub-assembly unit can be used as it is or edited.

Application Overview

Purpose

  • Purpose: To transfer and press-fit washers.
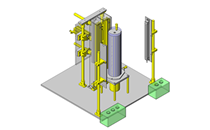
    Operation: A washer is suctioned by vacuum, rotated by 180°, transferred to the press fitting part, and press-fit onto the shaft by the cylinder. The head rotates by -180° to return to the suction part to pick up the next workpiece.

Target workpiece

  • Workpiece: washer
    Size: φ20, t0.5

Design Specifications

Operating Conditions or Design Requirements

  • Outer dimensions: W230 x D263 x H598mm
    Rotating angle:±180°
    Press fit stroke:8mm
    Suction head positioning time(when rotated by 180°)1Sec

Required Performance

  • Press fitting force: 40N or higher

Selection Criteria for Main Components

  • As the press fitting force is 40N or higher, a φ20 cylinder is selected.
    To achieve 180° rotation time of 1 second, a 100W motor is selected.

Design Evaluation

Verification of main components

  • Verify if the motor selected can satisfy the load inertia and load torque requirements.
  • Calculation of shaft-converted load inertia
    • Conditional value: inertia of reducer JMG = 0.051kg·cm², inertia of shaft JS = 4.705kg·m², inertia of coupling JC = 6.300kg·cm², inertia of rotary table JK = 198.4kg·cm², reduction ratio 1/nm = 1/21.
    • From shaft-converted load inertia JL = JMG + (JC + JK + JS) x (1/nm)², JL = 0.051 + (6.3 + 198.375 + 4.705) x (1/21)² = 0.526kg·cm².
      From inertia ratio m = JL/JM, m = 0.526/0.078 = 6.8 < 17 times (motor specification recommended value).
  • Calculation of torque during acceleration
    • Conditional value: efficiency of drive section η = 0.980, motor rotation speed N0 = 832.233r/min, acceleration time Tsa = 0.200s, motor shaft-converted load torque TL = 0.000N·m.
    • From torque during ascending acceleration TMa = ((((JL/η) + JM) x N0) / (9.55 x 10⁴ x Tsa)) + TL, TMa = ((((0.526 / 0.987) + 0.078) x 832.233) / (9.55 x 104 x 0.2)) + 0.000 = 0.027N·m.
    • The maximum torque is reached during acceleration, and as peak load rate Rp is obtained by Rp = (Tma / Ttyp) x 100, where rated torque Ttyp = 0.32N·m,
      Rp = (0.027/0.32) x 100 = 8.438%
    • If the actual load torque is calculated by calculating the torque during each operation pattern, 0.014N·m < 0.32N·m (rated torque).

Other Design Consideration

  • As the index table for feeding workpieces is arranged at a lower position, the mounting bracket for the motor is placed at the top of the mechanism.
    In addition, a servo motor is employed to address high speed requirements and the acceleration/deceleration.

Explore Similar Application Examples

Page - / -

Part List

No. Part Name Sample Picture MISUMI Part Number
For Price and Days to ship click on Part No.
Quantity
1 Air Cylinders MSCCS20-20-A-AM8-NB-TK0 1
2 One-Touch Couplings MSCNL4-M5 2
3 Dowel Pins MS6-10 3
4 Linear Bushings LMUW8 2
5 Compression Springs WT18-35 2
6 Retaining Rings-External STWS8 2
7 Retaining Rings RTWS15 4
8 Stopper Bolts STRC4-25 2
9 Bearing Nut FUNT30 1
10 Stop Pins STEHN7 2
11 Couplings CPDW40-16-19 1
12 Oil Free Bushings JZB8-10 2
13 Deep Groove Ball Bearings B6206ZZNR 1
14 Deep Groove Ball Bearings B6206ZZ 1
15 O Ring NPA4 2
16 O Ring NPA8 2
17 Sensors for Air Cylinders MD14L3 2
  • The part list above only contains MISUMI parts.
    Part list download (CSV) includes MISUMI and third party components used in this example.
  • TERMS AND CONDITIONS FOR USE OF CAD DATA
    Your access to the CAD data that MISUMI Corporation (hereinafter referred to as the Company) posts on this site (including 3D CAD data, intermediate 3D CAD data and 2D CAD data; hereinafter referred to as the Data) are of products manufactured and/or sold by the Company (hereinafter referred to as the Products) assumes that you have read and accepted these terms and conditions which govern your use of the Data. If you do not agree to these terms and conditions, you must stop using this website and the Data. You must not use the Data for any unlawful purpose or in any manner inconsistent with these terms and conditions.
    1. CAD Data
    The Data is prepared for assisting the Company's users in the CAD design process by providing dimensions and other Product information. In order to provide the best speed and stability working within this site, the Product drawings were simplified to reduce the size of the Data. For instance, some of the Products are shown without the oil groove shape, screws or spring shape. Also, please be aware that the tolerance, surface roughness and/or chamfer of the Data may vary from the actual Products.
    2. Disclaimer on Data
    While the Company has carefully prepared the Data, accuracy of the Data is not guaranteed and is subject to the variances as described above. The Company may also modify, add or delete the Data at any time without prior notice. The Company assumes no liability for any direct, indirect, consequential or special damages that you may claim resulted from your use of the Data or any changes to or deletions of the Data regardless of the reason. The Company provides no warranty as to the quality, accuracy, functionality, safety or reliability of the combination of Products and parts. Example applications and combinations of the Products are provided for illustrative purposes only.
    3. Copyright
    Copyrights to the content and the Data belong to the Company or the manufacturers of the Products. The said copyright is protected by the Copyright Act and international treaties. The use (including duplication, modification, uploading, posting, transmission, distribution, licensing, sales and publishing) of the Data except for the purpose to use the Data described above without prior approval of the Company is not allowed. The Data cannot be used for any purposes (including sales promotion) except for designing your machine. If you violate this provision or the laws or regulations, the Company may prohibit you from the use of the Data, the Company’s site and/or take legal action. So long as you comply with these terms and conditions, the Company grants to you a non-exclusive, non-transferable, revocable license to access and use the Data for the sole purpose of assisting you in designing machines that incorporate products.
    In case that the CAD data is found to have been to be used for any purpose other than mentioned above or against the related laws, MISUMI may take legal actions, including the one for blocking the involved user from using CAD data and from accessing to the MISUMI site.
    4. Disclaimer of Warranty
    ANY AND ALL CONTENT APPEARING ON THIS WEB SITE IS PROVIDED FOR INFORMATIONAL PURPOSES ONLY. THIS WEB SITE, ITS CONTENT AND ITS LINKS ARE PROVIDED ON AN "AS IS" AND "AS AVAILABLE" BASIS AND ARE USED ONLY AT YOUR SOLE RISK, TO THE FULLEST EXTENT PERMISSIBLE BY LAW. THE COMPANY DISCLAIMS ALL WARRANTIES, EXPRESS OR IMPLIED, OF ANY KIND, REGARDING THIS WEB SITE (INCLUDING ITS CONTENT, HARDWARE, SOFTWARE AND LINKS), INCLUDING AS TO FITNESS FOR A PARTICULAR PURPOSE, MERCHANTABILITY, TITLE, NON INFRINGEMENT, RESULTS, ACCURACY, COMPLETENESS, ACCESSIBILITY, COMPATIBILITY, SECURITY AND FREEDOM FROM COMPUTER VIRUS. THE COMPANY WILL NOT BE LIABLE FOR ANY DAMAGES OR LOSSES, INCLUDING DIRECT, INDIRECT, CONSEQUENTIAL, SPECIAL, INCIDENTAL OR PUNITIVE DAMAGES AND/OR LOST PROFITS, IN CONNECTION WITH USE OF THE INTERNET, THIS WEB SITE, ITS CONTENT OR ITS LINKS
    Further, the Company will not be liable to you for any failure or delay by the Company to provide access to the Data or any of its obligations under these terms and conditions where such failure or delay is the direct or indirect result of any circumstances beyond the Company's reasonable control (and the Company's obligations will be suspended for the duration of such circumstances).
    5. Policy of Third Parties
    You may be required to separately agree to third party's policies if you use third party software to create or browse the Data or use a third party’s CAD data. In this case, the Company does not assume any responsibility for defects of such CAD data or the software of the third party or violation of their rights. Understand them before use.

    CAD Download (Unit Assembly)

    CAD Download: File Format
    生成

    Thank you for downloading the data.

    Click the Good IDEA! button when you find interesting design tips.


    This data is utilized in order to list more useful application examples in the future.

    CAD Data Limitations

    1. Assembly data shows the assembly drawings in the concept design phase. The sole purpose of the data is to explain the structure and functionality of the assembly and is not considered nor to be used as a final design.
      You will need to edit the Data so that it meets your specific design conditions.
    2. Unit assembly Data consists of some sub-assemblies.
      It is configured so that each sub-assembly unit can be used as it is or edited.
    3. * The part in the frame is a sub-assembly unit.

    4. The Data for fabricated parts is based on easy-to-edit dimensions and shapes in sketches and histories.
    5. The Data including the third-part components are made by the Company.

    Page top

Page top