(!)Due to Microsoft's end of support for Internet Explorer 11 on 15/06/2022, this site does not support the recommended environment.

ideanote
inCAD Library

Please read before use

What is inCAD Library?

  • Helpful application examples for mechanical engineers.

The Concept of inCAD Library

  • Online application library with a range of ideas for all manufacturing industries.
  • Save design time and learn new design applications when you are concepting new machines.

Disclaimer

  • MISUMI may not offer all parts in each application design. Available parts can only be purchased separately not as a unit shown in each application design.
  • MISUMI does not guarantee quality, accuracy, functionality, safety or reliability for the combination of the parts in each application example. Accept these points prior to use.
  • 2014 Copyright MISUMI
  • The data cannot be used for any purposes (including sales promotion) except for designing your machine.
  • All associated CAD is free. Misumi reserves the right at its sole discretion to cancel, terminate or modify this offer.
  • MISUMI may change, add or delete application examples posted without prior notice.
  • MISUMI assumes no responsibilities for any damage incurred resulting from your use of the Service or any change, addition or deletion by MISUMI of the application examples for any reason whatsoever.

inCAD Library Features

  1. Get great new design ideas for these application examples.
  2. Over 300 design application ideas
    collected from dozens of industries!

  3. Find application examples quickly! Search by function, workpiece shape, etc.

  4. Download the CAD models for each application example.
  5. Log in to download free CAD models.
    Download CAD for the entire application example!

Good IDEA! button

Click the Good IDEA! Button when you like an application example!

*Can only be clicked once per application example.

  • Upper right corner on the page of application example details

  • Pop-up dialog for CAD data downloading

Page top

Keyword Search
No. Search
SNS: 

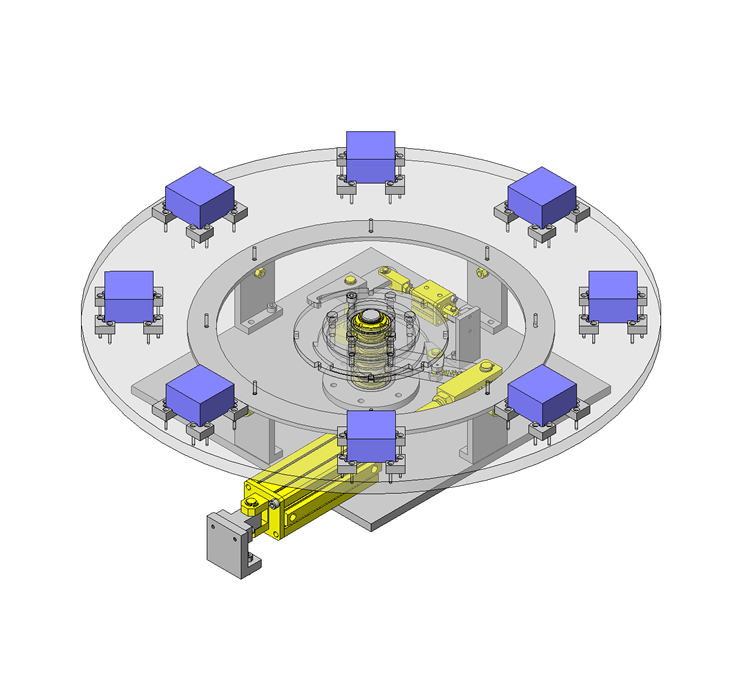
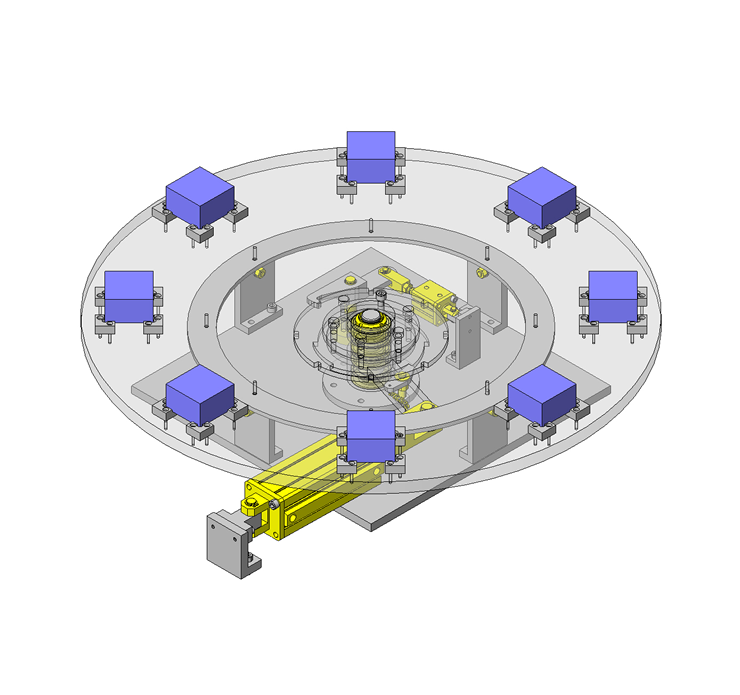
No.000148 Intermittent Rotation Mechanism

Cylinder-driven index table.

Relevant category

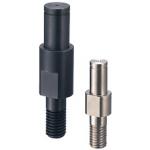
Cantilever Shafts

Product name Cantilever Shafts - Pilot Type - Standard, Threaded, with Retaining Ring Groove
Part number FXCA8-8-F7-G5
* Orange colored cells in the table below indicate the part numbers used in this example.

Selection criteria

Low cost and short lead time

Back to page top

Available sizes

■Cantilever Shafts (Piloted Thread with Retaining Ring Groove)

Type Material Surface Treatment
Thread Length Fixed

Screw Length Selectable
1045 Carbon Steel Black Oxide
Electroless Nickel Plating
304 Stainless Steel -
4137 Alloy Steel Black Oxide

■Sizes

Pin Dia.
(mm)
(1 mm Increments) M(Coarse)
Y F G N
3 2-30 3-50 3-8 3-6 M3
4 4-8 M4
5 5-10 M5
6 2-60 5-100 5-10 6-12 M6
8 8-16 M8
10 10-20 M10
12 10-150 5-15 12-24 M12
13
15
16
17 5-20
18
20 4-75 20-40 M20
M16
22 M20
M16
25 M20
M16
30 M20
M16

Back to page top

Accuracy Info

■Accuracy of Cantilever Shafts

Perpendicularity: 0.02

Pin Dia.
(mm)
Tolerance g6
(mm)
3 -0.002
-0.008
4 -0.004
-0.012
5
6
8 -0.005
-0.014
10
12 -0.006
-0.017
13
15
16
17
18
20 -0.007
-0.020
22
25
30

Back to page top

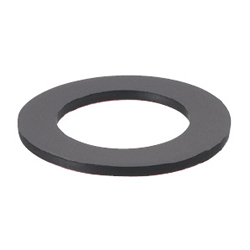
Extra Thin Resin Washer

Product name Extra Thin Resin Washers
Part number SWSPS16-8-1.0
* Orange colored cells in the table below indicate the part numbers used in this example.

Selection criteria

To help prevent poor rotation caused by the load along the thrust direction

Back to page top

Available sizes

■Extra Thin Resin Washer

Material: Polyslider

■Sizes and Dimensions

O.D. Inner Dia. (Selectable) Thickness
8 3 4 5 - - - - - - - 0.13
0.25
0.5
1.0
10 - 4 5 6 - - - - - -
12 - 4 5 6 8 - - - - -
14 - - 5 6 8 10 - - - -
15 - - 5 6 8 10 12 - - -
16 - - - 6 8 10 12 - - -
20 - - - 6 8 10 12 15 16 - 0.25
0.5
25 - - - 6 8 10 12 15 16 20

Back to page top

Accuracy Info

■Thickness Tolerance of Extra Thin Resin Washer (Abrasion Resistant Type)

Thickness 0.13 0.25 0.5 1.0
Tolerance ±0.013 ±0.025 ±0.05 ±0.1

Back to page top

Performance info.

■Characteristic Data of Extra Thin Resin Washer (Abrasion Resistant Type)

Item Value
Tensile Strength (Mpa) 98
Elongation (%) 60
Friction Coefficient (µ) 0.16~0.4
Insulation Resistance (kV/mm) 45

Back to page top

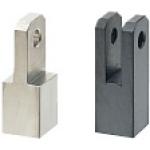
Knuckle Joints

Product name Knuckle Joints - Tapped, Configurable
Part number FNTB6-1.0-D6-B6-U15
Features Convex and Concave types
* Orange colored cells in the table below indicate the part numbers used in this example.

Selection criteria

Effective as an oscillating part for a cylinder & link mechanism

Back to page top

Available sizes

■Knuckle Joints - Tapped, Configurable

Convex Shaped Concave Shaped Material Surface Treatment
Standard Wide Type Bolt Fixing Type
1045 Carbon Steel Black Oxide
Electroless Nickel Plating
304 Stainless Steel -

■Sizes and Dimensions

M-Pitch Hole Dia. (Selectable) B 1 mm Increment Overall Length A
Convex Type Concave Type
Standard Wide
Type
Bolt Fixing
Type
*3-0.5 3 4 5 - - - - - - - - - 3~10 3~5 6~10 6~10 L+6
*4-0.7
*5-0.8 - 4 5 6 - - - - - - - - 4~12 4~6 7~12 7~12
*6-1.0
 8-1.0 - - 5 6 8 - - - - - - - 5~16 5~8 9~16 L+8
*8-1.25 9~16
 10-1.25 - - - 6 8 10 - - - - - - 6~20 6~10 11~20
*10-1.5 11~20
 12-1.25 - - - - 8 10 12 13 - - - - 8~22 8~11 12~22 - L+10
 12-1.5
 14-1.5 - - - - - 10 12 13 14 15 16 - 10~25 10~13 14~25 L+12
 16-1.5
 18-1.5 - - - - - - 12 13 14 15 16 20 12~28 12~14 15~28 L+14
 22-1.5 12~32 12~16 - L+16
 26-1.5 12~38 12~18 L+19

Only those sizes with * marks are available for Bolt Fixing Concave Type.

Back to page top

IDEA NOTE Use an air cylinder

You can create a turn table with air cylinders instead of motors.

IDEA NOTE Improve rigidity

This structure uses cam followers to provide additional support for the turn table.

IDEA NOTE Cross-section view

Ratchet plate and the positioning plate fastened together.

  • TERMS AND CONDITIONS FOR USE OF CAD DATA
    Your access to the CAD data that MISUMI Corporation (hereinafter referred to as the Company) posts on this site (including 3D CAD data, intermediate 3D CAD data and 2D CAD data; hereinafter referred to as the Data) are of products manufactured and/or sold by the Company (hereinafter referred to as the Products) assumes that you have read and accepted these terms and conditions which govern your use of the Data. If you do not agree to these terms and conditions, you must stop using this website and the Data. You must not use the Data for any unlawful purpose or in any manner inconsistent with these terms and conditions.
    1. CAD Data
    The Data is prepared for assisting the Company's users in the CAD design process by providing dimensions and other Product information. In order to provide the best speed and stability working within this site, the Product drawings were simplified to reduce the size of the Data. For instance, some of the Products are shown without the oil groove shape, screws or spring shape. Also, please be aware that the tolerance, surface roughness and/or chamfer of the Data may vary from the actual Products.
    2. Disclaimer on Data
    While the Company has carefully prepared the Data, accuracy of the Data is not guaranteed and is subject to the variances as described above. The Company may also modify, add or delete the Data at any time without prior notice. The Company assumes no liability for any direct, indirect, consequential or special damages that you may claim resulted from your use of the Data or any changes to or deletions of the Data regardless of the reason. The Company provides no warranty as to the quality, accuracy, functionality, safety or reliability of the combination of Products and parts. Example applications and combinations of the Products are provided for illustrative purposes only.
    3. Copyright
    Copyrights to the content and the Data belong to the Company or the manufacturers of the Products. The said copyright is protected by the Copyright Act and international treaties. The use (including duplication, modification, uploading, posting, transmission, distribution, licensing, sales and publishing) of the Data except for the purpose to use the Data described above without prior approval of the Company is not allowed. The Data cannot be used for any purposes (including sales promotion) except for designing your machine. If you violate this provision or the laws or regulations, the Company may prohibit you from the use of the Data, the Company’s site and/or take legal action. So long as you comply with these terms and conditions, the Company grants to you a non-exclusive, non-transferable, revocable license to access and use the Data for the sole purpose of assisting you in designing machines that incorporate products.
    In case that the CAD data is found to have been to be used for any purpose other than mentioned above or against the related laws, MISUMI may take legal actions, including the one for blocking the involved user from using CAD data and from accessing to the MISUMI site.
    4. Disclaimer of Warranty
    ANY AND ALL CONTENT APPEARING ON THIS WEB SITE IS PROVIDED FOR INFORMATIONAL PURPOSES ONLY. THIS WEB SITE, ITS CONTENT AND ITS LINKS ARE PROVIDED ON AN "AS IS" AND "AS AVAILABLE" BASIS AND ARE USED ONLY AT YOUR SOLE RISK, TO THE FULLEST EXTENT PERMISSIBLE BY LAW. THE COMPANY DISCLAIMS ALL WARRANTIES, EXPRESS OR IMPLIED, OF ANY KIND, REGARDING THIS WEB SITE (INCLUDING ITS CONTENT, HARDWARE, SOFTWARE AND LINKS), INCLUDING AS TO FITNESS FOR A PARTICULAR PURPOSE, MERCHANTABILITY, TITLE, NON INFRINGEMENT, RESULTS, ACCURACY, COMPLETENESS, ACCESSIBILITY, COMPATIBILITY, SECURITY AND FREEDOM FROM COMPUTER VIRUS. THE COMPANY WILL NOT BE LIABLE FOR ANY DAMAGES OR LOSSES, INCLUDING DIRECT, INDIRECT, CONSEQUENTIAL, SPECIAL, INCIDENTAL OR PUNITIVE DAMAGES AND/OR LOST PROFITS, IN CONNECTION WITH USE OF THE INTERNET, THIS WEB SITE, ITS CONTENT OR ITS LINKS
    Further, the Company will not be liable to you for any failure or delay by the Company to provide access to the Data or any of its obligations under these terms and conditions where such failure or delay is the direct or indirect result of any circumstances beyond the Company's reasonable control (and the Company's obligations will be suspended for the duration of such circumstances).
    5. Policy of Third Parties
    You may be required to separately agree to third party's policies if you use third party software to create or browse the Data or use a third party’s CAD data. In this case, the Company does not assume any responsibility for defects of such CAD data or the software of the third party or violation of their rights. Understand them before use.

    CAD Download (Unit Assembly)

    CAD Download: File Format
    生成

    Thank you for downloading the data.

    Click the Good IDEA! button when you find interesting design tips.


    This data is utilized in order to list more useful application examples in the future.

    CAD Data Limitations

    1. Assembly data shows the assembly drawings in the concept design phase. The sole purpose of the data is to explain the structure and functionality of the assembly and is not considered nor to be used as a final design.
      You will need to edit the Data so that it meets your specific design conditions.
    2. Unit assembly Data consists of some sub-assemblies.
      It is configured so that each sub-assembly unit can be used as it is or edited.
    3. * The part in the frame is a sub-assembly unit.

    4. The Data for fabricated parts is based on easy-to-edit dimensions and shapes in sketches and histories.
    5. The Data including the third-part components are made by the Company.

    Page top

  • * Unit assembly Data consists of some sub-assemblies.
       It is configured so that each sub-assembly unit can be used as it is or edited.

Application Overview

Purpose

  • Purpose
    • To rotate workpieces on 8-position index table.
  • Operation
    • Retracting the (indexing) cylinder, removes the finger from the groove of the indexing gear.
    • When the (rotation) cylinder is extended, the claw engages the ratchet gear and the index table rotates. The tension springs keeps the claw pressed against the gear.
    • When the (indexing) cylinder is extended, the finger is inserted into the groove to fix the rotational position.

Target workpiece

  • Shape: connector
  • Size: W50 x D50 x H30 mm
  • Weight: 0.15 kg

Design Specifications

Operating Conditions or Design Requirements

  • Movement angle: 45degrees
  • Cylinder stroke: 100mm
  • Stopper stroke: 10mm
  • Outer dimensions: φ600 x H114mm

Selection Criteria for Main Components

  • Selected an air cylinder that has the thrust specification required to rotate the index table 45 degrees in 1 second.

Design Evaluation

Verification of main components

  • Air Cylinder thrust calculation
  • Conditional value: angle θ = 45degrees, movement time t = 1sec., link arm length L = 0.125m, moment of inertia applied to air cylinder I = 0.5492kg·m²
  • As uniform acceleration motion is assumed as angular velocity here, θ: oscillating angle (rad), 45° = 2π/8rad
  • Angular velocity after t seconds: ω = 2·θ/t = 2 x (2 π/8)/1 = 1.571rad/sec
  • Equation of rotary motion: from I·ω = M and M = F·L, cylinder thrust F = I·ω/L = 0.5492 x 1.571/0.125 = 6.9N
  • Theoretical thrust of φ40 air cylinder: 628 (N) when air pressure in use is 0.5MPa
    -> As F = 6.9 (N) ≤ 628 (N), this is acceptable.

Other Design Consideration

  • Ensure the ratchet mechanism has sufficient strength.
    The bending stress needs to be 29 (N/mm²) or less and the shearing stress needs to be 24.7 (N/mm²) or less.
  • Ensure the indexing positioning part is strong enough to apply the required torque.

Explore Similar Application Examples

Page - / -

Part List

No. Part Name Sample Picture MISUMI Part Number
For Price and Days to ship click on Part No.
Quantity
1 Deep Groove Ball Bearings B6004ZZ 4
2 Collars FNCLM-V20-D26-L12 1
3 Metal Washers FWSSM-D26-V20-T4 1
4 Metal Washers FWSSM-D26-V20-T6 1
5 Fine U-Nuts FUNT20 1
6 Cantilever Pin FXCA8-8-F7-G5 1
7 Extra Thin Resin Washers SWSPS16-8-1.0 2
8 Tension Springs AWS5-20 1
9 Spring Anchors - Wrench Flats SAIPOZ3-10 2
10 Rotary Shaft PFXFA10A-47-F20 1
11 Air Cylinders MSCCA16-10 1
12 Brackets For Air Cylinders CTKM16 1
13 Knuckle Joint FNTB6-1.0-D6-B6-U15 1
14 Hinge Pins CCGH6-12 1
15 Air Cylinders MSCCA40-100 1
16 Brackets For Air Cylinders CTKM40 1
17 Knuckle Joint FNTB14-1.5-D12-B10-U30 1
18 Hinge Pins CDGH12-25 1
19 Cam Followers CFUA6-16 4
20 Oil Free Bushings BFLB10-20 1
21 Retaining Rings NETW9 1
22 Retaining Rings NETW7 1
  • The part list above only contains MISUMI parts.
    Part list download (CSV) includes MISUMI and third party components used in this example.
  • TERMS AND CONDITIONS FOR USE OF CAD DATA
    Your access to the CAD data that MISUMI Corporation (hereinafter referred to as the Company) posts on this site (including 3D CAD data, intermediate 3D CAD data and 2D CAD data; hereinafter referred to as the Data) are of products manufactured and/or sold by the Company (hereinafter referred to as the Products) assumes that you have read and accepted these terms and conditions which govern your use of the Data. If you do not agree to these terms and conditions, you must stop using this website and the Data. You must not use the Data for any unlawful purpose or in any manner inconsistent with these terms and conditions.
    1. CAD Data
    The Data is prepared for assisting the Company's users in the CAD design process by providing dimensions and other Product information. In order to provide the best speed and stability working within this site, the Product drawings were simplified to reduce the size of the Data. For instance, some of the Products are shown without the oil groove shape, screws or spring shape. Also, please be aware that the tolerance, surface roughness and/or chamfer of the Data may vary from the actual Products.
    2. Disclaimer on Data
    While the Company has carefully prepared the Data, accuracy of the Data is not guaranteed and is subject to the variances as described above. The Company may also modify, add or delete the Data at any time without prior notice. The Company assumes no liability for any direct, indirect, consequential or special damages that you may claim resulted from your use of the Data or any changes to or deletions of the Data regardless of the reason. The Company provides no warranty as to the quality, accuracy, functionality, safety or reliability of the combination of Products and parts. Example applications and combinations of the Products are provided for illustrative purposes only.
    3. Copyright
    Copyrights to the content and the Data belong to the Company or the manufacturers of the Products. The said copyright is protected by the Copyright Act and international treaties. The use (including duplication, modification, uploading, posting, transmission, distribution, licensing, sales and publishing) of the Data except for the purpose to use the Data described above without prior approval of the Company is not allowed. The Data cannot be used for any purposes (including sales promotion) except for designing your machine. If you violate this provision or the laws or regulations, the Company may prohibit you from the use of the Data, the Company’s site and/or take legal action. So long as you comply with these terms and conditions, the Company grants to you a non-exclusive, non-transferable, revocable license to access and use the Data for the sole purpose of assisting you in designing machines that incorporate products.
    In case that the CAD data is found to have been to be used for any purpose other than mentioned above or against the related laws, MISUMI may take legal actions, including the one for blocking the involved user from using CAD data and from accessing to the MISUMI site.
    4. Disclaimer of Warranty
    ANY AND ALL CONTENT APPEARING ON THIS WEB SITE IS PROVIDED FOR INFORMATIONAL PURPOSES ONLY. THIS WEB SITE, ITS CONTENT AND ITS LINKS ARE PROVIDED ON AN "AS IS" AND "AS AVAILABLE" BASIS AND ARE USED ONLY AT YOUR SOLE RISK, TO THE FULLEST EXTENT PERMISSIBLE BY LAW. THE COMPANY DISCLAIMS ALL WARRANTIES, EXPRESS OR IMPLIED, OF ANY KIND, REGARDING THIS WEB SITE (INCLUDING ITS CONTENT, HARDWARE, SOFTWARE AND LINKS), INCLUDING AS TO FITNESS FOR A PARTICULAR PURPOSE, MERCHANTABILITY, TITLE, NON INFRINGEMENT, RESULTS, ACCURACY, COMPLETENESS, ACCESSIBILITY, COMPATIBILITY, SECURITY AND FREEDOM FROM COMPUTER VIRUS. THE COMPANY WILL NOT BE LIABLE FOR ANY DAMAGES OR LOSSES, INCLUDING DIRECT, INDIRECT, CONSEQUENTIAL, SPECIAL, INCIDENTAL OR PUNITIVE DAMAGES AND/OR LOST PROFITS, IN CONNECTION WITH USE OF THE INTERNET, THIS WEB SITE, ITS CONTENT OR ITS LINKS
    Further, the Company will not be liable to you for any failure or delay by the Company to provide access to the Data or any of its obligations under these terms and conditions where such failure or delay is the direct or indirect result of any circumstances beyond the Company's reasonable control (and the Company's obligations will be suspended for the duration of such circumstances).
    5. Policy of Third Parties
    You may be required to separately agree to third party's policies if you use third party software to create or browse the Data or use a third party’s CAD data. In this case, the Company does not assume any responsibility for defects of such CAD data or the software of the third party or violation of their rights. Understand them before use.

    CAD Download (Unit Assembly)

    CAD Download: File Format
    生成

    Thank you for downloading the data.

    Click the Good IDEA! button when you find interesting design tips.


    This data is utilized in order to list more useful application examples in the future.

    CAD Data Limitations

    1. Assembly data shows the assembly drawings in the concept design phase. The sole purpose of the data is to explain the structure and functionality of the assembly and is not considered nor to be used as a final design.
      You will need to edit the Data so that it meets your specific design conditions.
    2. Unit assembly Data consists of some sub-assemblies.
      It is configured so that each sub-assembly unit can be used as it is or edited.
    3. * The part in the frame is a sub-assembly unit.

    4. The Data for fabricated parts is based on easy-to-edit dimensions and shapes in sketches and histories.
    5. The Data including the third-part components are made by the Company.

    Page top

Page top