(!)Due to Microsoft's end of support for Internet Explorer 11 on 15/06/2022, this site does not support the recommended environment.
Mon. - Fri. 8 a.m. - 6 p.m.
All Categories
-
Automation Components
Automation Components
Show all categories of Automation Components-
Linear Motion
-
Rotary Motion
-
Connecting Parts
-
Rotary Power Transmission
-
Motors
-
Conveyors & Material Handling
-
Locating, Positioning, Jigs & Fixtures
-
Inspection
-
Sensors, Switches
-
Pneumatics, Hydraulics
-
Vacuum Components
-
Hydraulic Equipment
-
Spray Equipment And Accessories
-
Pipe, Tubes, Hoses & Fittings
-
Modules, Units
-
Heaters, Temperature Control
-
Aluminum Extrusions, Framing, Support & Posts
-
Casters, Leveling Mounts, Posts
-
Doors, Cabinet Hardware
-
Springs, Shock Absorbers
-
Adjustment/Fastening Components, Pins, Magnets
-
Antivibration, Soundproofing Materials, Safety Products
-
- Fasteners
- Materials
-
Wiring Components
Wiring Components
Show all categories of Wiring Components-
LAN Cables / Industrial Network Cables
-
Equipment Specific Cables
-
Cordsets
-
Computer & AV Cables
-
Wire/Cable
-
Connector (General Purpose)
-
Crimp Terminal Components
-
Cable Organization
-
Cable Gland Components
-
Cable Bushing/Clip/Sticker
-
Screw/Spacer
-
Cable accessories
-
Tube
-
Electrical Conduits
-
Duct/Wiring
-
Electrical Wiring Tools
-
Dedicated tools
-
Soldering supplies
-
- Electrical & Controls
-
Cutting Tools
Cutting Tools
Show all categories of Cutting Tools-
Carbide End Mill
-
HSS End Mill
-
Concrete Drill Bits
-
Milling Cutter Insert / Holder
-
Core Drill Bits
-
Customized Straight Blade End Mill
-
Dedicated Cutter
-
Crinkey Cutters
-
Turning Tool
-
Drill
-
Cutting Tool Accessories
-
Screw Hole Related Tools
-
Reamer
-
Electric Drill Bits
-
Chamfering, Centering Tool
-
Hole Saws
-
Magnetic Drill Press Cutters
-
Step Drills
-
Wood Drills & Cutters
-
-
Processing Tools
- Packing & Logistics Storage Supplies
- Safety Products
-
Research and Development & Cleanroom Supplies
Research and Development & Cleanroom Supplies
Show all categories of Research and Development & Cleanroom Supplies - Press Die Components
-
Plastic Mold Components
Plastic Mold Components
Show all categories of Plastic Mold Components-
Ejector Pins
-
Sleeves, Center Pins
-
Core Pins
-
Sprue bushings, Gates, and other components
-
Date Mark Inserts, Recycle Mark Inserts, Pins with Gas Vent
-
Undercut, Plates
-
Leader Components, Components for Ejector Space
-
Mold Opening Controllers
-
Cooling or Heating Components
-
Accessories, Others
-
Components of Large Mold, Die Casting
-
-
Injection Molding Components
Injection Molding Components
Show all categories of Injection Molding Components-
Purging Agent
-
Injection Molding Machine Products
-
Accessories of Equipment
-
Auxiliary Equipment
-
Air Nippers
-
Air Cylinders
-
Air Chuck for Runner
-
Chuck Board Components
-
Frames
-
Suction Components
-
Parallel Air Chuck
-
Special Air Chuck
-
Mold Maintenance
-
Heating Items
-
Heat Insulation Sheets
-
Couplers, Plugs, One-touch Joints
-
Tubes, Hoses, Peripheral Components
-
- Webcode Seach | Series
-
#CODE
- Discontinued Products
Loading...
- inCAD Library Home
- > No.000152 Lifter Mechanism
No.000152 Lifter Mechanism
Lifting mechanism guided by interlocking gears
Relevant category
- * Unit assembly Data consists of some sub-assemblies.
It is configured so that each sub-assembly unit can be used as it is or edited.
Application Overview
Purpose
- Purpose
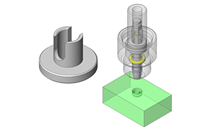
- To fit bushings onto a roughly positioned pin.
- Operation
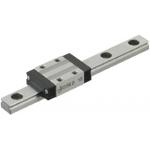
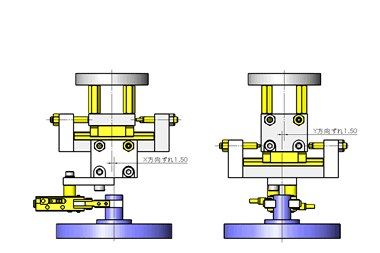
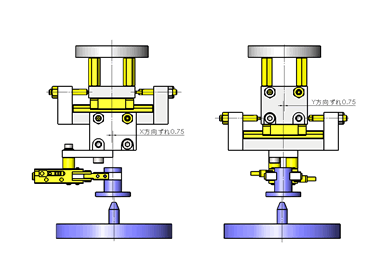
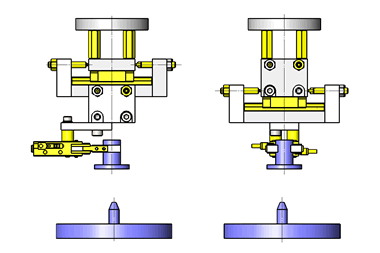
- This mechanism is designed to perform floating in the X and Y directions via two linear guides installed between the lift unit and the bushing chuck. Before the bushing is fit on the pin, the bushing chuck is at the center position. The lift unit lowers the bushing and bushing chuck. The bushing is floated toward the pin and then fit on the pin. After fitting the bushing, the bushing chuck is returned to the center by the spring plunger.
Target workpiece
- (1) Bushing
- Shape: cylinder
- Size: φ20 x H20mm
- Weight: 7g
- (2) Pin
- Shape: column
- Size: φ7 x H15mm
- Weight: 110g
Design Specifications
Operating Conditions or Design Requirements
- Vertical stroke by lift unit: 38mm
- Allowable maximum displacement between inserted workpiece: L = 1.5mm
- Outer dimensions: W88 x D100 x H96mm
Required Performance
- Positioning accuracy: ±0.1mm
Selection Criteria for Main Components
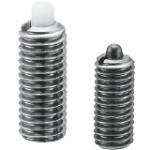
- Spring Plungers
- To enable the bushing chuck to be returned to the center position when the inserted workpiece is unclamped, select spring plungers whose minimum load is larger than the seal resistance of the linear guide, which is between 2N and 5N.
Design Evaluation
Verification of main components
- Compare the centering force against the spring plunger clamp force to see whether the workpiece can be centered
- Check the centering force of the inserted workpiece and the spring plunger clamp power
- Conditional value: centering pin taper angle of inserted workpiece θ = 23°, downward clamp force of lift unit P = 30N, gravitational acceleration g = 9.8m/s², friction coefficient: µ = 0.2 (metal and metal)
- Friction angle: ψ, from μ = tanψ, ψ = tan - 1μ = tan - 1 (0.2) = 11.3°
- The inserting workpiece centering force F is, from P = F x tan (θ + ψ), F = P/(tan (θ + ψ)) = 30/(tan (23 + 11.3)) = 44.0N
- Spring plunger clamp power PS = 5.8 to 13.6N = inserting workpiece centering force F = 44.0N
⇒ As the inserting workpiece centering force is sufficiently larger than the spring plunger clamp power, centering cannot be achieved. The chuck position should be returned to the center before workpiece insertion.
Explore Similar Application Examples
-
Relevant category
-
Relevant category
-
Relevant category


