(!)Due to Microsoft's end of support for Internet Explorer 11 on 15/06/2022, this site does not support the recommended environment.

ideanote
inCAD Library

Please read before use

What is inCAD Library?

  • Helpful application examples for mechanical engineers.

The Concept of inCAD Library

  • Online application library with a range of ideas for all manufacturing industries.
  • Save design time and learn new design applications when you are concepting new machines.

Disclaimer

  • MISUMI may not offer all parts in each application design. Available parts can only be purchased separately not as a unit shown in each application design.
  • MISUMI does not guarantee quality, accuracy, functionality, safety or reliability for the combination of the parts in each application example. Accept these points prior to use.
  • 2014 Copyright MISUMI
  • The data cannot be used for any purposes (including sales promotion) except for designing your machine.
  • All associated CAD is free. Misumi reserves the right at its sole discretion to cancel, terminate or modify this offer.
  • MISUMI may change, add or delete application examples posted without prior notice.
  • MISUMI assumes no responsibilities for any damage incurred resulting from your use of the Service or any change, addition or deletion by MISUMI of the application examples for any reason whatsoever.

inCAD Library Features

  1. Get great new design ideas for these application examples.
  2. Over 300 design application ideas
    collected from dozens of industries!

  3. Find application examples quickly! Search by function, workpiece shape, etc.

  4. Download the CAD models for each application example.
  5. Log in to download free CAD models.
    Download CAD for the entire application example!

Good IDEA! button

Click the Good IDEA! Button when you like an application example!

*Can only be clicked once per application example.

  • Upper right corner on the page of application example details

  • Pop-up dialog for CAD data downloading

Page top

Keyword Search
No. Search
SNS: 

No.000222 Stepped Feed Mechanism Using Cylinder

Cylinder-driven stepped feed

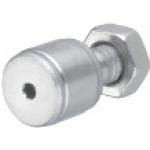
Cam Followers

Product name Miniature Cam Followers
Part number CFFAM3-6
* Orange colored cells in the table below indicate the part numbers used in this example.

Selection criteria

Create even intervals for height adjustment of workpiece supporting plate.

Available sizes

■Miniature Cam Followers

Material
52100 Bearing Steel(Stud: 4115 Alloy Steel)
440C Stainless Steel

■Sizes and Dimensions

Shaft Dia.
(mm)
Outer Ring Dia.
(mm)
2.5 5
3 6
4 8
5 10
6 12

Back to page top

Accuracy Info

■Accuracy of Cam Followers

Shaft Dia.
(mm)
Shaft Dia. Tolerance
(mm)
2.5 0
-0.006
3
4 0
-0.008
5
6

Back to page top

Performance info.

■Speeds / Loads (Load Info) of the Cam Followers

Shaft Dia.
(mm)
Basic Load Rating Basic Dynamic Load Rating
(N)
Basic Static Load Rating
(rpm)
Max. Allowable Load (N) Max. Rotational Speed(N)
2.5 350 285 285 3360
3 565 525 525 2800
4 915 915 915 2100
5 1340 1400 1400 1680
6 1880 2040 2040 1400

Back to page top

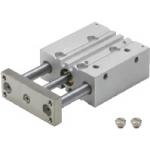
Cylinders with Guides

Product name Cylinders with Twin Guides
Part number MGCLB12-10
Features Cylinder uses two rods and bushings for guidance and rigidity.
* Orange colored cells in the table below indicate the part numbers used in this example.

Selection criteria

Design and stroke, since cylinders are used to press against cam followers.

Available sizes

■Cylinders with Twin Guides

Cyl. Bore Bearing Sliding Bearing Linear Bushing Cylinder width
(mm)
Overall Length
(Listed below + St)
Thickness
(mm)
St 10 20 25 30 40 50 75 100 10 20 25 30 40 50 75 100
φ12 56 39 22
φ16 62 43 25
φ20 72 47 30
φ25 86 47.5 38
φ32 112 48
φ50 146 72 60

Back to page top

Selection steps

■Cylinder Selection Steps

1. Define various conditions of the load.

2. Calculate cylinder output (In case of double acting type)

3. Determine the cylinder bore

4. Determine the theoretical reference speed.

5. Verify the cylinder's cushion mechanism.

6. Verify the lateral load applied to the cylinder.

Back to page top

Accuracy Info

■Non-rotating accuracy of Cylinder with guides

Non-rotating accuracy: A value of runout due to clearances between the guide rod and bearings represented in an angle of rotation about the piston rod.

Cyl. Bore Non-rotating Accuracy of Link Bar Tip
Sliding Bearing Linear Bushing
φ12 ±0.12° ±0.06°
φ16 ±0.10° ±0.06°
φ20 ±0.09° ±0.05°
φ25 ±0.08° ±0.05°
φ32 ±0.06° ±0.04°
φ50 ±0.05°

Back to page top

Performance info.

■Cylinder with Guides Operating Pressure Range

Min. Operating Pressure (MPa): 0.1
Max. Operating Pressure (MPa): 1.0
Pressure Resistance (MPa): 1.5

(N)

Cyl. Bore
(mm)
Operating Direction Operating Pressure (MPa)
0.4 0.5
12 Outstroke 45 57
Instroke 34 42
16 Outstroke 80 101
Instroke 60 75
20 Outstroke 126 157
Instroke 94 118
25 Outstroke 196 245
Instroke 151 189
32 Outstroke 322 402
Instroke 241 302
50 Outstroke 785 982
Instroke 660 825

■Allowable Lateral Load

(N・m)

Cyl. Bore
(mm)
Stroke (mm)
10 20 25 30 40 50 75 100
12 24 19 16 14 12 37 31
16 40 33 28 24 21 55 46
20 52 45 39 35 55 46
25 69 60 52 47 73 62
32 166 131 107 91
50 296 245 241

Back to page top

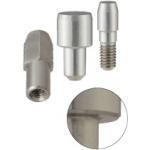
Locating Pin

Product name Locating Pins - High Rigidity Stainless Steel, Large Head, Tapered
Part number AFPBA5-P6-L10-B6
* Orange colored cells in the table below indicate the part numbers used in this example.

Selection criteria

Effective for using as the workpiece positioning pin

Available sizes

■Locating Pins - High Rigidity Stainless Steel, Large Head, Tapered

Material Hardness Pin Shape Shank Shape
High Rigidity Stainless Steel Hardness: 35HRC~ Round Press Fitm 6 Press Fitp 6 Tapped g6 Threaded g6
Diamond

■Sizes and Dimensions of the Press-fit Type

Shank Dia. Pin Head Dia.
0.01 mm Increments
Shank Pilot Length
Unit: 1 mm Increments
Pin Section Length
Unit: 0.1 mm Increments
φ2 2.50~8.00 3(4)~16 1.0~15.0
φ3 3.50~8.00
φ4 4.50~8.00
φ5 5.50~8.00
φ6 6.50~10.00
φ8 8.50~10.00 4(5)~16

The dimension in ( ) is applicable to Diamond Shape.

■Sizes and Dimensions of the Tapped Type

Shank Dia. Pin Head Dia.
0.01 mm Increments
Shank Pilot Length
Unit: 1 mm Increments
Pin Section Length
Unit: 0.1 mm Increments
φ6 6.50~10.00 6(9)~16 1.0~15.0
φ8 8.50~10.00 8(12)~16

The dimension in ( ) is applicable to Diamond Shape.

■Sizes and Dimensions of the Threaded Type

Shank Dia. Pin Head Dia.
0.01 mm Increments
Shank Pilot Length
Unit: 1 mm Increments
Pin Section Length
Unit: 0.1 mm Increments
φ3 3.50~8.00 3~10 1.0~15.0
φ4 4.50~8.00
φ5 5.50~8.00
φ6 6.50~10.00
φ8 8.50~10.00 4~10

Back to page top

Accuracy Info

■Accuracy of the Locating Pins - High Rigidity Stainless Steel, Large Head, Tapered

Press Fit Threaded Tapped
Shank Dia. Tolerance m6 g6 g6 g6

Pin Head Dia. Tolerance: 0/-0.01
Concentricity of the Shank Pilot and the Pin Head: φ 0.01

Back to page top

IDEA NOTE Stepped feed achieved only by air cylinder

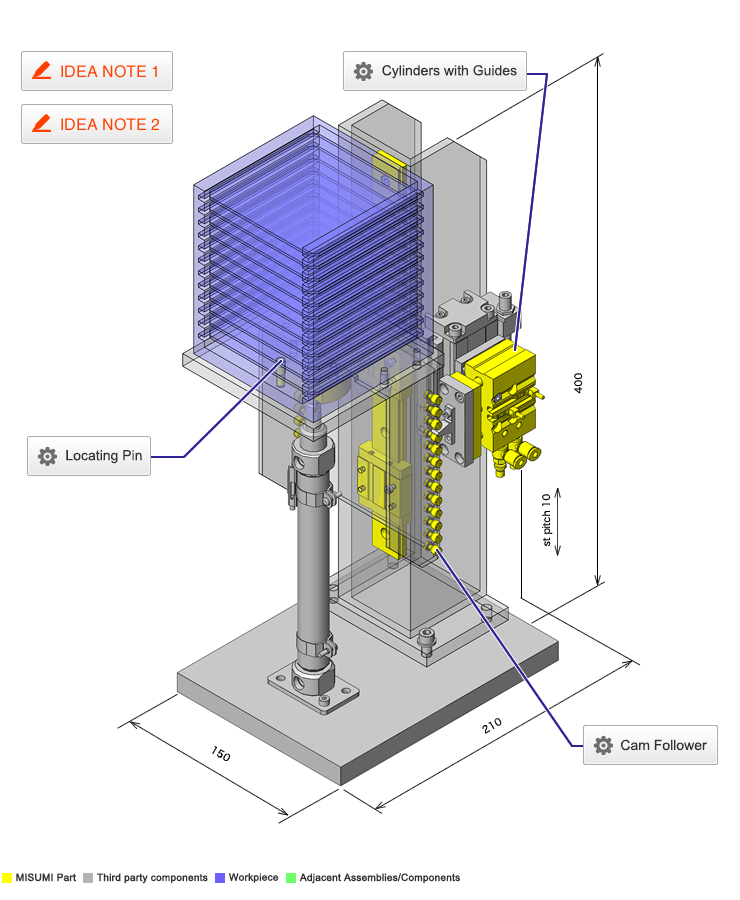
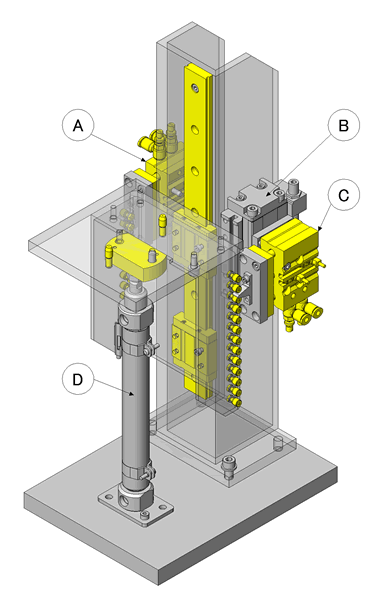
By combining the movements of four air cylinders - A: stopper pin cylinder, B: pitch feed cylinder, C: feed pin cylinder, D: return cylinder (balancer cylinder), stepped feed is performed.

IDEA NOTE Reduction of design man-hours and manufacturing cost

Reduction of design man-hours and manufacturing cost can be achieved through the employment of cylinders with a guide as the stopper cylinder, pin insertion cylinder, and feed cylinder.

  • TERMS AND CONDITIONS FOR USE OF CAD DATA
    Your access to the CAD data that MISUMI Corporation (hereinafter referred to as the Company) posts on this site (including 3D CAD data, intermediate 3D CAD data and 2D CAD data; hereinafter referred to as the Data) are of products manufactured and/or sold by the Company (hereinafter referred to as the Products) assumes that you have read and accepted these terms and conditions which govern your use of the Data. If you do not agree to these terms and conditions, you must stop using this website and the Data. You must not use the Data for any unlawful purpose or in any manner inconsistent with these terms and conditions.
    1. CAD Data
    The Data is prepared for assisting the Company's users in the CAD design process by providing dimensions and other Product information. In order to provide the best speed and stability working within this site, the Product drawings were simplified to reduce the size of the Data. For instance, some of the Products are shown without the oil groove shape, screws or spring shape. Also, please be aware that the tolerance, surface roughness and/or chamfer of the Data may vary from the actual Products.
    2. Disclaimer on Data
    While the Company has carefully prepared the Data, accuracy of the Data is not guaranteed and is subject to the variances as described above. The Company may also modify, add or delete the Data at any time without prior notice. The Company assumes no liability for any direct, indirect, consequential or special damages that you may claim resulted from your use of the Data or any changes to or deletions of the Data regardless of the reason. The Company provides no warranty as to the quality, accuracy, functionality, safety or reliability of the combination of Products and parts. Example applications and combinations of the Products are provided for illustrative purposes only.
    3. Copyright
    Copyrights to the content and the Data belong to the Company or the manufacturers of the Products. The said copyright is protected by the Copyright Act and international treaties. The use (including duplication, modification, uploading, posting, transmission, distribution, licensing, sales and publishing) of the Data except for the purpose to use the Data described above without prior approval of the Company is not allowed. The Data cannot be used for any purposes (including sales promotion) except for designing your machine. If you violate this provision or the laws or regulations, the Company may prohibit you from the use of the Data, the Company’s site and/or take legal action. So long as you comply with these terms and conditions, the Company grants to you a non-exclusive, non-transferable, revocable license to access and use the Data for the sole purpose of assisting you in designing machines that incorporate products.
    In case that the CAD data is found to have been to be used for any purpose other than mentioned above or against the related laws, MISUMI may take legal actions, including the one for blocking the involved user from using CAD data and from accessing to the MISUMI site.
    4. Disclaimer of Warranty
    ANY AND ALL CONTENT APPEARING ON THIS WEB SITE IS PROVIDED FOR INFORMATIONAL PURPOSES ONLY. THIS WEB SITE, ITS CONTENT AND ITS LINKS ARE PROVIDED ON AN "AS IS" AND "AS AVAILABLE" BASIS AND ARE USED ONLY AT YOUR SOLE RISK, TO THE FULLEST EXTENT PERMISSIBLE BY LAW. THE COMPANY DISCLAIMS ALL WARRANTIES, EXPRESS OR IMPLIED, OF ANY KIND, REGARDING THIS WEB SITE (INCLUDING ITS CONTENT, HARDWARE, SOFTWARE AND LINKS), INCLUDING AS TO FITNESS FOR A PARTICULAR PURPOSE, MERCHANTABILITY, TITLE, NON INFRINGEMENT, RESULTS, ACCURACY, COMPLETENESS, ACCESSIBILITY, COMPATIBILITY, SECURITY AND FREEDOM FROM COMPUTER VIRUS. THE COMPANY WILL NOT BE LIABLE FOR ANY DAMAGES OR LOSSES, INCLUDING DIRECT, INDIRECT, CONSEQUENTIAL, SPECIAL, INCIDENTAL OR PUNITIVE DAMAGES AND/OR LOST PROFITS, IN CONNECTION WITH USE OF THE INTERNET, THIS WEB SITE, ITS CONTENT OR ITS LINKS
    Further, the Company will not be liable to you for any failure or delay by the Company to provide access to the Data or any of its obligations under these terms and conditions where such failure or delay is the direct or indirect result of any circumstances beyond the Company's reasonable control (and the Company's obligations will be suspended for the duration of such circumstances).
    5. Policy of Third Parties
    You may be required to separately agree to third party's policies if you use third party software to create or browse the Data or use a third party’s CAD data. In this case, the Company does not assume any responsibility for defects of such CAD data or the software of the third party or violation of their rights. Understand them before use.

    CAD Download (Unit Assembly)

    CAD Download: File Format
    生成

    Thank you for downloading the data.

    Click the Good IDEA! button when you find interesting design tips.


    This data is utilized in order to list more useful application examples in the future.

    CAD Data Limitations

    1. Assembly data shows the assembly drawings in the concept design phase. The sole purpose of the data is to explain the structure and functionality of the assembly and is not considered nor to be used as a final design.
      You will need to edit the Data so that it meets your specific design conditions.
    2. Unit assembly Data consists of some sub-assemblies.
      It is configured so that each sub-assembly unit can be used as it is or edited.
    3. * The part in the frame is a sub-assembly unit.

    4. The Data for fabricated parts is based on easy-to-edit dimensions and shapes in sketches and histories.
    5. The Data including the third-part components are made by the Company.

    Page top

  • * Unit assembly Data consists of some sub-assemblies.
       It is configured so that each sub-assembly unit can be used as it is or edited.

Application Overview

Purpose

  • Purpose
    • Performing pitch feed to a position for loading and unloading the workpiece stocker.
  • Operation
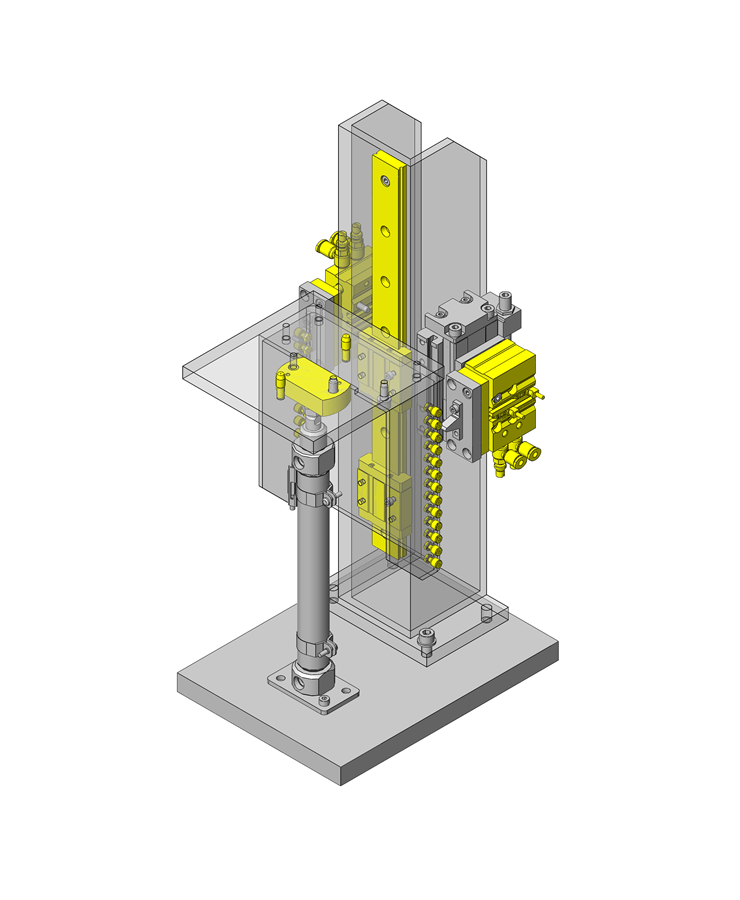
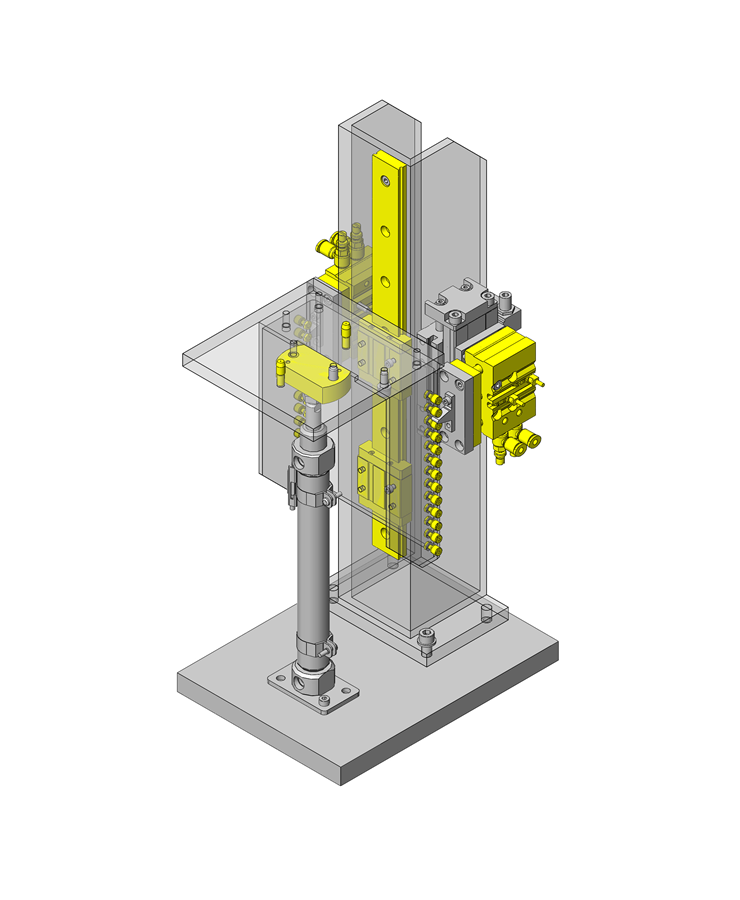
    • (1) Balancer cylinder descends to lower end, pitch feed cylinder descends, while stopper and feed pin cylinders are in retracted position.
      (2) Stopper pin cylinder extends.
      (3) Feed pin extends while stopper pin cylinder returns.
      (4) Pitch feed cylinder ascends.
      (5) Stopper pin extends and feed pin cylinder returns.
      (6) Pitch feed cylinder descends, repeats (3) to (6) 12 times. (workpiece loading onto stacker)
      (7) The balancer cylinder is at the upper end.
      (8) Stopper pin returns.
      (9) Returns to balancer cylinder lower end (unloading from stocker) (2).
      * For the roles of the cylinders, refer to IDEA NOTE 1.

Target workpiece

  • Shape: thin plate workpiece
  • Size: W100 x D100 x t2.0 mm
  • Weight: 0.03 kg
  • Stocker (capable of mounting 12 thin plate workpieces)
  • Size: W110 x D110 x H134 mm
    Weight: 0.6 kg

Design Specifications

Operating Conditions or Design Requirements

  • Ascending feed pitch: 10 mm
  • Outer dimensions: W150 x D210 x H400 mm

Selection Criteria for Main Components

  • Cam followers are used for position, retention/feed of the stacker. They are arranged at the same pitch as the stacker pitch.
  • Select pitch feed cylinder to have same stroke as the stacker pitch.
  • For the cylinders for stopper and push pin movement, select a stroke that allows the pin to escape.

Design Evaluation

Verification of main components

  • Whether the selected cylinder is appropriate for the workpiece load is verified.
      Vertical feed Cylinder
  • Conditional value: operating air pressure 0.5 (MPa), efficiency: 0.8
  • Vertical feed cylinder thrust: 113 N
  • Vertical feed cylinder thrust = cylinder thrust x efficiency = 113 x 0.8 = 90.4 N

    Balancer Cylinder
  • Conditional value: operating air pressure 0.1 (MPa), efficiency: 0.8
  • Cylinder theoretical thrust: 31 N
  • Balancer cylinder thrust = cylinder thrust x efficiency = 31 x 0.8 = 24.8 N 

    Load factor
  • Conditional value: workpiece weight 0.03 (kg), stacker weight 0.6 (kg), weight of parts included in lift unit 1.8 (kg), number of workpieces 12
  • From load = (workpiece weight + stacker weight + lift unit weight) x 9.8,
    Load = (0.03 (kg) x 12 + 0.6 (kg) + 1.8 (kg)) x 9.8 = 27 N
  • From load factor (%) = (load/cylinder thrust) x 100,
    Load factor = (27/ (90.4 + 24.8)) x 100 = 23.4(%) < 50 (%)
    ⇒Selected cylinder meet design requirements.

Other Design Consideration

  • The balance cylinder of this mechanism is structured with an air regulator to prevent load from being applied to the stepped feed cylinder.
  • By utilizing a cylinder with a stopper (an external stopper can also be used) as the vertical feed cylinder, fine adjustment is possible and a repeatability of ±0.05 mm is achieved.

Explore Similar Application Examples

Page - / -

Part List

No. Part Name Sample Picture MISUMI Part Number
For Price and Days to ship click on Part No.
Quantity
1 Floating Joints FJCC8-1.25 1
2 Linear Guides SSE2BW14-310 1
3 Miniature Cam Followers CFFAM3-6 26
4 Air Cylinders With Twin Guides MGCLB12-10 2
5 Sensors for Air Cylinders ME34L1 4
6 Locating Pins(Currently not available) AFPBA5-P6-L10-B6-E3 2
7 Flow Rate Control Valves SPSNL4-M5 4
  • The part list above only contains MISUMI parts.
    Part list download (CSV) includes MISUMI and third party components used in this example.
  • TERMS AND CONDITIONS FOR USE OF CAD DATA
    Your access to the CAD data that MISUMI Corporation (hereinafter referred to as the Company) posts on this site (including 3D CAD data, intermediate 3D CAD data and 2D CAD data; hereinafter referred to as the Data) are of products manufactured and/or sold by the Company (hereinafter referred to as the Products) assumes that you have read and accepted these terms and conditions which govern your use of the Data. If you do not agree to these terms and conditions, you must stop using this website and the Data. You must not use the Data for any unlawful purpose or in any manner inconsistent with these terms and conditions.
    1. CAD Data
    The Data is prepared for assisting the Company's users in the CAD design process by providing dimensions and other Product information. In order to provide the best speed and stability working within this site, the Product drawings were simplified to reduce the size of the Data. For instance, some of the Products are shown without the oil groove shape, screws or spring shape. Also, please be aware that the tolerance, surface roughness and/or chamfer of the Data may vary from the actual Products.
    2. Disclaimer on Data
    While the Company has carefully prepared the Data, accuracy of the Data is not guaranteed and is subject to the variances as described above. The Company may also modify, add or delete the Data at any time without prior notice. The Company assumes no liability for any direct, indirect, consequential or special damages that you may claim resulted from your use of the Data or any changes to or deletions of the Data regardless of the reason. The Company provides no warranty as to the quality, accuracy, functionality, safety or reliability of the combination of Products and parts. Example applications and combinations of the Products are provided for illustrative purposes only.
    3. Copyright
    Copyrights to the content and the Data belong to the Company or the manufacturers of the Products. The said copyright is protected by the Copyright Act and international treaties. The use (including duplication, modification, uploading, posting, transmission, distribution, licensing, sales and publishing) of the Data except for the purpose to use the Data described above without prior approval of the Company is not allowed. The Data cannot be used for any purposes (including sales promotion) except for designing your machine. If you violate this provision or the laws or regulations, the Company may prohibit you from the use of the Data, the Company’s site and/or take legal action. So long as you comply with these terms and conditions, the Company grants to you a non-exclusive, non-transferable, revocable license to access and use the Data for the sole purpose of assisting you in designing machines that incorporate products.
    In case that the CAD data is found to have been to be used for any purpose other than mentioned above or against the related laws, MISUMI may take legal actions, including the one for blocking the involved user from using CAD data and from accessing to the MISUMI site.
    4. Disclaimer of Warranty
    ANY AND ALL CONTENT APPEARING ON THIS WEB SITE IS PROVIDED FOR INFORMATIONAL PURPOSES ONLY. THIS WEB SITE, ITS CONTENT AND ITS LINKS ARE PROVIDED ON AN "AS IS" AND "AS AVAILABLE" BASIS AND ARE USED ONLY AT YOUR SOLE RISK, TO THE FULLEST EXTENT PERMISSIBLE BY LAW. THE COMPANY DISCLAIMS ALL WARRANTIES, EXPRESS OR IMPLIED, OF ANY KIND, REGARDING THIS WEB SITE (INCLUDING ITS CONTENT, HARDWARE, SOFTWARE AND LINKS), INCLUDING AS TO FITNESS FOR A PARTICULAR PURPOSE, MERCHANTABILITY, TITLE, NON INFRINGEMENT, RESULTS, ACCURACY, COMPLETENESS, ACCESSIBILITY, COMPATIBILITY, SECURITY AND FREEDOM FROM COMPUTER VIRUS. THE COMPANY WILL NOT BE LIABLE FOR ANY DAMAGES OR LOSSES, INCLUDING DIRECT, INDIRECT, CONSEQUENTIAL, SPECIAL, INCIDENTAL OR PUNITIVE DAMAGES AND/OR LOST PROFITS, IN CONNECTION WITH USE OF THE INTERNET, THIS WEB SITE, ITS CONTENT OR ITS LINKS
    Further, the Company will not be liable to you for any failure or delay by the Company to provide access to the Data or any of its obligations under these terms and conditions where such failure or delay is the direct or indirect result of any circumstances beyond the Company's reasonable control (and the Company's obligations will be suspended for the duration of such circumstances).
    5. Policy of Third Parties
    You may be required to separately agree to third party's policies if you use third party software to create or browse the Data or use a third party’s CAD data. In this case, the Company does not assume any responsibility for defects of such CAD data or the software of the third party or violation of their rights. Understand them before use.

    CAD Download (Unit Assembly)

    CAD Download: File Format
    生成

    Thank you for downloading the data.

    Click the Good IDEA! button when you find interesting design tips.


    This data is utilized in order to list more useful application examples in the future.

    CAD Data Limitations

    1. Assembly data shows the assembly drawings in the concept design phase. The sole purpose of the data is to explain the structure and functionality of the assembly and is not considered nor to be used as a final design.
      You will need to edit the Data so that it meets your specific design conditions.
    2. Unit assembly Data consists of some sub-assemblies.
      It is configured so that each sub-assembly unit can be used as it is or edited.
    3. * The part in the frame is a sub-assembly unit.

    4. The Data for fabricated parts is based on easy-to-edit dimensions and shapes in sketches and histories.
    5. The Data including the third-part components are made by the Company.

    Page top

Page top