(!)Due to Microsoft's end of support for Internet Explorer 11 on 15/06/2022, this site does not support the recommended environment.

ideanote
inCAD Library

Please read before use

What is inCAD Library?

  • Helpful application examples for mechanical engineers.

The Concept of inCAD Library

  • Online application library with a range of ideas for all manufacturing industries.
  • Save design time and learn new design applications when you are concepting new machines.

Disclaimer

  • MISUMI may not offer all parts in each application design. Available parts can only be purchased separately not as a unit shown in each application design.
  • MISUMI does not guarantee quality, accuracy, functionality, safety or reliability for the combination of the parts in each application example. Accept these points prior to use.
  • 2014 Copyright MISUMI
  • The data cannot be used for any purposes (including sales promotion) except for designing your machine.
  • All associated CAD is free. Misumi reserves the right at its sole discretion to cancel, terminate or modify this offer.
  • MISUMI may change, add or delete application examples posted without prior notice.
  • MISUMI assumes no responsibilities for any damage incurred resulting from your use of the Service or any change, addition or deletion by MISUMI of the application examples for any reason whatsoever.

inCAD Library Features

  1. Get great new design ideas for these application examples.
  2. Over 300 design application ideas
    collected from dozens of industries!

  3. Find application examples quickly! Search by function, workpiece shape, etc.

  4. Download the CAD models for each application example.
  5. Log in to download free CAD models.
    Download CAD for the entire application example!

Good IDEA! button

Click the Good IDEA! Button when you like an application example!

*Can only be clicked once per application example.

  • Upper right corner on the page of application example details

  • Pop-up dialog for CAD data downloading

Page top

Keyword Search
No. Search
SNS: 

No.000108 Linear Movement Mechanism

Low speed stroke for a short distance.

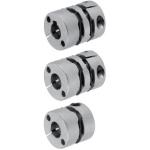
Couplings

Product name Couplings - High Torque Disc, Clamping
Part number MCKLCLK32-10-12
* Orange colored cells in the table below indicate the part numbers used in this example.

Selection criteria

Can tolerate large lateral / angular misalignments

Back to page top

Available sizes

■Couplings - High Torque Disc, Clamping

Material Surface Treatment Accessory Keywayed shaft bore
Main Body Disc Main Body
Aluminum Diecast Carbon Fiber Electroless Nickel Plating Hex Socket Head Cap Screw None・One side・Both sides

■Sizes and Dimensions

O.D. Shaft bore DIA. (Select drive/driven sides) Overall Length Clamp Screw
φ3 φ4 φ5 φ6 φ6.35 φ7 φ8 φ9.53 φ10 φ11 φ12 φ14 φ15 φ16 φ18 φ20 φ22 φ24
φ13 19 M2
φ16 23.2 M2.5
φ20 26
φ25 30.2 M3
φ32 41 M4
φ40 47 M5
φ50 53 M6

* Keywayed bore type is selectable for φ6 or larger

Back to page top

Accuracy Info

■Accuracy of coupling

O.D. Shaft Bore
Tolerance
Allowable
Angular Misalignment
( )
Lateral
Misalignment
(mm)
φ13 H8 2.5 0.2
φ16
φ20
φ25
φ32
φ40 0.3
φ50

Back to page top

Performance info.

■Load info. on coupling

O.D. Allowable Torque
(N・m)
Max. Rotational Speed
(r/min)
Moment of Inertia
(kg・m²)
φ13 0.35 12000 8.0×10⁻⁸
φ16 0.6 9000 2.4×10⁻⁷
φ20 0.9 7600 7.2×10⁻⁷
φ25 2.2 6000 2.2×10⁻⁶
φ32 3.8 4800 6.0×10⁻⁶
φ40 6.8 4000 1.7×10⁻⁵
φ50 11.0 3500 4.6×10⁻⁵

Back to page top

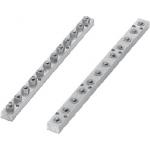
Ball Roller Units

Product name Ball Roller Units - Hex Head, Stud / Press-Fit Type
Part number BUHA400
* Orange colored cells in the table below indicate the part numbers used in this example.

Selection criteria

Can effectively move the workpiece freely in the XY direction

Back to page top

Available sizes

■Ball Roller Units - Hex Head, Stud / Press-Fit Type

Material Ball Roller
Ball Rollers Frame Load capacity per pc
Main Body / Spacer Main Ball / Sub Ball
304 Stainless Steel 440C Stainless Steel(HRC55〜) 6063 Aluminum Alloy(Clear Anodize) BCHA24 343N

■Ball Roller Units - Press Fit Type

Overall Length Number of Rollers Roller Pitch Overall Width Overall Height
200 4 50 40 32
400 8
600 12

Back to page top

IDEA NOTE Uses a rotary actuator as a drive source.

The rotary actuator is used to save space because there is a restriction on the upward stroke. This actuator is also used because the design requires a slow stroke.

IDEA NOTE Prevention of oil splash

Since the actuator and other components are located below the workpiece transfer face, a cover is installed around the thrust bearing to help prevent contamination.

IDEA NOTE Absorbs misalignment between shafts.

To help prevent misalignment between the rotary actuator shaft and the lead screw shaft, a thrust bearing and double disc type coupling are employed.

  • TERMS AND CONDITIONS FOR USE OF CAD DATA
    Your access to the CAD data that MISUMI Corporation (hereinafter referred to as the Company) posts on this site (including 3D CAD data, intermediate 3D CAD data and 2D CAD data; hereinafter referred to as the Data) are of products manufactured and/or sold by the Company (hereinafter referred to as the Products) assumes that you have read and accepted these terms and conditions which govern your use of the Data. If you do not agree to these terms and conditions, you must stop using this website and the Data. You must not use the Data for any unlawful purpose or in any manner inconsistent with these terms and conditions.
    1. CAD Data
    The Data is prepared for assisting the Company's users in the CAD design process by providing dimensions and other Product information. In order to provide the best speed and stability working within this site, the Product drawings were simplified to reduce the size of the Data. For instance, some of the Products are shown without the oil groove shape, screws or spring shape. Also, please be aware that the tolerance, surface roughness and/or chamfer of the Data may vary from the actual Products.
    2. Disclaimer on Data
    While the Company has carefully prepared the Data, accuracy of the Data is not guaranteed and is subject to the variances as described above. The Company may also modify, add or delete the Data at any time without prior notice. The Company assumes no liability for any direct, indirect, consequential or special damages that you may claim resulted from your use of the Data or any changes to or deletions of the Data regardless of the reason. The Company provides no warranty as to the quality, accuracy, functionality, safety or reliability of the combination of Products and parts. Example applications and combinations of the Products are provided for illustrative purposes only.
    3. Copyright
    Copyrights to the content and the Data belong to the Company or the manufacturers of the Products. The said copyright is protected by the Copyright Act and international treaties. The use (including duplication, modification, uploading, posting, transmission, distribution, licensing, sales and publishing) of the Data except for the purpose to use the Data described above without prior approval of the Company is not allowed. The Data cannot be used for any purposes (including sales promotion) except for designing your machine. If you violate this provision or the laws or regulations, the Company may prohibit you from the use of the Data, the Company’s site and/or take legal action. So long as you comply with these terms and conditions, the Company grants to you a non-exclusive, non-transferable, revocable license to access and use the Data for the sole purpose of assisting you in designing machines that incorporate products.
    In case that the CAD data is found to have been to be used for any purpose other than mentioned above or against the related laws, MISUMI may take legal actions, including the one for blocking the involved user from using CAD data and from accessing to the MISUMI site.
    4. Disclaimer of Warranty
    ANY AND ALL CONTENT APPEARING ON THIS WEB SITE IS PROVIDED FOR INFORMATIONAL PURPOSES ONLY. THIS WEB SITE, ITS CONTENT AND ITS LINKS ARE PROVIDED ON AN "AS IS" AND "AS AVAILABLE" BASIS AND ARE USED ONLY AT YOUR SOLE RISK, TO THE FULLEST EXTENT PERMISSIBLE BY LAW. THE COMPANY DISCLAIMS ALL WARRANTIES, EXPRESS OR IMPLIED, OF ANY KIND, REGARDING THIS WEB SITE (INCLUDING ITS CONTENT, HARDWARE, SOFTWARE AND LINKS), INCLUDING AS TO FITNESS FOR A PARTICULAR PURPOSE, MERCHANTABILITY, TITLE, NON INFRINGEMENT, RESULTS, ACCURACY, COMPLETENESS, ACCESSIBILITY, COMPATIBILITY, SECURITY AND FREEDOM FROM COMPUTER VIRUS. THE COMPANY WILL NOT BE LIABLE FOR ANY DAMAGES OR LOSSES, INCLUDING DIRECT, INDIRECT, CONSEQUENTIAL, SPECIAL, INCIDENTAL OR PUNITIVE DAMAGES AND/OR LOST PROFITS, IN CONNECTION WITH USE OF THE INTERNET, THIS WEB SITE, ITS CONTENT OR ITS LINKS
    Further, the Company will not be liable to you for any failure or delay by the Company to provide access to the Data or any of its obligations under these terms and conditions where such failure or delay is the direct or indirect result of any circumstances beyond the Company's reasonable control (and the Company's obligations will be suspended for the duration of such circumstances).
    5. Policy of Third Parties
    You may be required to separately agree to third party's policies if you use third party software to create or browse the Data or use a third party’s CAD data. In this case, the Company does not assume any responsibility for defects of such CAD data or the software of the third party or violation of their rights. Understand them before use.

    CAD Download (Unit Assembly)

    CAD Download: File Format
    生成

    Thank you for downloading the data.

    Click the Good IDEA! button when you find interesting design tips.


    This data is utilized in order to list more useful application examples in the future.

    CAD Data Limitations

    1. Assembly data shows the assembly drawings in the concept design phase. The sole purpose of the data is to explain the structure and functionality of the assembly and is not considered nor to be used as a final design.
      You will need to edit the Data so that it meets your specific design conditions.
    2. Unit assembly Data consists of some sub-assemblies.
      It is configured so that each sub-assembly unit can be used as it is or edited.
    3. * The part in the frame is a sub-assembly unit.

    4. The Data for fabricated parts is based on easy-to-edit dimensions and shapes in sketches and histories.
    5. The Data including the third-part components are made by the Company.

    Page top

  • * Unit assembly Data consists of some sub-assemblies.
       It is configured so that each sub-assembly unit can be used as it is or edited.

Application Overview

Purpose

  • Purpose
    • Jack for switching mold type.
  • Operation
    • By rotating the rotary actuator by 180 degrees, the lead screw is rotated converting rotary motion into linear motion.

Points for use

  • A heavy load is slowly raised a short distance. A rotary actuator is used as the drive source.

Target workpiece

  • Mold for lead frame
  • Size: W180 x D310 x H214mm
  • Weight: 34kg

Design Specifications

Operating Conditions or Design Requirements

  • Ascending/descending stroke: 2.5mm
  • Safety factor: S = 1.7
  • Outer dimensions: W180 x D400 x H262mm

Required Performance

  • Positioning accuracy: ±0.05mm
  • Upward thrust: 580N

Selection Criteria for Main Components

  • Lead Screw
    • Since the ascending/descending stroke is 2.5mm, a 5-mm lead is selected as its multiple number lead.
  • Rotary actuator
    • A rotary actuator with an oscillation angle of 180° and a torque of 1.7N·m (0.5MPa) or higher is selected.

Design Evaluation

Verification of main components

  • Whether an appropriate thrust for raising the workpiece can be obtained using the specified rotary actuator and the lead screw.
  • Calculation of upward thrust
    • Conditional value: workpiece mass W = 55kg, gravitational acceleration g = 9.8m/s², friction coefficient μ = 0.21, lead of lead screw R = 5mm, lead angle d = 4°40' = 4.67°, rotary actuator torque T = 1.863N·m= 186.3N·cm
      Screw efficiency: η = (1 - μ x tan(d))/(1 + μ/tan(d))
      =(1 - 0.21 x tan4.67°)/(1 + 0.21/tan4.67°)
      =0.275
      Upward thrust F = (2π x η x T)/R
      = (2π x 0.275 x 186.3)/0.5
      =644N

Explore Similar Application Examples

Page - / -

Part List

No. Part Name Sample Picture MISUMI Part Number
For Price and Days to ship click on Part No.
Quantity
1 Ball Bearing B51201 1
2 Couplings MCKLCLK32-10-12 1
3 Lead Screw Nuts MTSQR22 1
4 Linear Bushings LHIRWM20 2
5 Holders For Shaft SSTHRL20 2
6 Linear Shaft RSFAW20-150-M6-N6 2
7 Circular Post PETR15-45 4
8 Circular Post PETR20-60 6
9 Bearing Holder BVFCM30-NC 1
10 Sheet Metal Bracket BFHBF-SPU-A58-T1-D23-Q45-N5 1
11 Flow Rate Control Valves SPSNL6-1 2
12 Ball Rollers Unit BUHA400 2
  • The part list above only contains MISUMI parts.
    Part list download (CSV) includes MISUMI and third party components used in this example.
  • TERMS AND CONDITIONS FOR USE OF CAD DATA
    Your access to the CAD data that MISUMI Corporation (hereinafter referred to as the Company) posts on this site (including 3D CAD data, intermediate 3D CAD data and 2D CAD data; hereinafter referred to as the Data) are of products manufactured and/or sold by the Company (hereinafter referred to as the Products) assumes that you have read and accepted these terms and conditions which govern your use of the Data. If you do not agree to these terms and conditions, you must stop using this website and the Data. You must not use the Data for any unlawful purpose or in any manner inconsistent with these terms and conditions.
    1. CAD Data
    The Data is prepared for assisting the Company's users in the CAD design process by providing dimensions and other Product information. In order to provide the best speed and stability working within this site, the Product drawings were simplified to reduce the size of the Data. For instance, some of the Products are shown without the oil groove shape, screws or spring shape. Also, please be aware that the tolerance, surface roughness and/or chamfer of the Data may vary from the actual Products.
    2. Disclaimer on Data
    While the Company has carefully prepared the Data, accuracy of the Data is not guaranteed and is subject to the variances as described above. The Company may also modify, add or delete the Data at any time without prior notice. The Company assumes no liability for any direct, indirect, consequential or special damages that you may claim resulted from your use of the Data or any changes to or deletions of the Data regardless of the reason. The Company provides no warranty as to the quality, accuracy, functionality, safety or reliability of the combination of Products and parts. Example applications and combinations of the Products are provided for illustrative purposes only.
    3. Copyright
    Copyrights to the content and the Data belong to the Company or the manufacturers of the Products. The said copyright is protected by the Copyright Act and international treaties. The use (including duplication, modification, uploading, posting, transmission, distribution, licensing, sales and publishing) of the Data except for the purpose to use the Data described above without prior approval of the Company is not allowed. The Data cannot be used for any purposes (including sales promotion) except for designing your machine. If you violate this provision or the laws or regulations, the Company may prohibit you from the use of the Data, the Company’s site and/or take legal action. So long as you comply with these terms and conditions, the Company grants to you a non-exclusive, non-transferable, revocable license to access and use the Data for the sole purpose of assisting you in designing machines that incorporate products.
    In case that the CAD data is found to have been to be used for any purpose other than mentioned above or against the related laws, MISUMI may take legal actions, including the one for blocking the involved user from using CAD data and from accessing to the MISUMI site.
    4. Disclaimer of Warranty
    ANY AND ALL CONTENT APPEARING ON THIS WEB SITE IS PROVIDED FOR INFORMATIONAL PURPOSES ONLY. THIS WEB SITE, ITS CONTENT AND ITS LINKS ARE PROVIDED ON AN "AS IS" AND "AS AVAILABLE" BASIS AND ARE USED ONLY AT YOUR SOLE RISK, TO THE FULLEST EXTENT PERMISSIBLE BY LAW. THE COMPANY DISCLAIMS ALL WARRANTIES, EXPRESS OR IMPLIED, OF ANY KIND, REGARDING THIS WEB SITE (INCLUDING ITS CONTENT, HARDWARE, SOFTWARE AND LINKS), INCLUDING AS TO FITNESS FOR A PARTICULAR PURPOSE, MERCHANTABILITY, TITLE, NON INFRINGEMENT, RESULTS, ACCURACY, COMPLETENESS, ACCESSIBILITY, COMPATIBILITY, SECURITY AND FREEDOM FROM COMPUTER VIRUS. THE COMPANY WILL NOT BE LIABLE FOR ANY DAMAGES OR LOSSES, INCLUDING DIRECT, INDIRECT, CONSEQUENTIAL, SPECIAL, INCIDENTAL OR PUNITIVE DAMAGES AND/OR LOST PROFITS, IN CONNECTION WITH USE OF THE INTERNET, THIS WEB SITE, ITS CONTENT OR ITS LINKS
    Further, the Company will not be liable to you for any failure or delay by the Company to provide access to the Data or any of its obligations under these terms and conditions where such failure or delay is the direct or indirect result of any circumstances beyond the Company's reasonable control (and the Company's obligations will be suspended for the duration of such circumstances).
    5. Policy of Third Parties
    You may be required to separately agree to third party's policies if you use third party software to create or browse the Data or use a third party’s CAD data. In this case, the Company does not assume any responsibility for defects of such CAD data or the software of the third party or violation of their rights. Understand them before use.

    CAD Download (Unit Assembly)

    CAD Download: File Format
    生成

    Thank you for downloading the data.

    Click the Good IDEA! button when you find interesting design tips.


    This data is utilized in order to list more useful application examples in the future.

    CAD Data Limitations

    1. Assembly data shows the assembly drawings in the concept design phase. The sole purpose of the data is to explain the structure and functionality of the assembly and is not considered nor to be used as a final design.
      You will need to edit the Data so that it meets your specific design conditions.
    2. Unit assembly Data consists of some sub-assemblies.
      It is configured so that each sub-assembly unit can be used as it is or edited.
    3. * The part in the frame is a sub-assembly unit.

    4. The Data for fabricated parts is based on easy-to-edit dimensions and shapes in sketches and histories.
    5. The Data including the third-part components are made by the Company.

    Page top

Page top