(!)Due to Microsoft's end of support for Internet Explorer 11 on 15/06/2022, this site does not support the recommended environment.
Mon. - Fri. 8 a.m. - 6 p.m.
All Categories
Categories
- Automation Components
- Linear Motion
- Rotary Motion
- Connecting Parts
- Rotary Power Transmission
- Motors
- Conveyors & Material Handling
- Locating, Positioning, Jigs & Fixtures
- Inspection
- Sensors, Switches
- Pneumatics, Hydraulics
- Vacuum Components
- Hydraulic Equipment
- Spray Equipment And Accessories
- Pipe, Tubes, Hoses & Fittings
- Modules, Units
- Heaters, Temperature Control
- Aluminum Extrusions, Framing, Support & Posts
- Casters, Leveling Mounts, Posts
- Doors, Cabinet Hardware
- Springs, Shock Absorbers
- Adjustment/Fastening Components, Pins, Magnets
- Antivibration, Soundproofing Materials, Safety Products
- Fasteners
- Materials
- Wiring Components
- LAN Cables / Industrial Network Cables
- Equipment Specific Cables
- Cordsets
- Computer & AV Cables
- Wire/Cable
- Connector (General Purpose)
- Crimp Terminal Components
- Cable Organization
- Cable Gland Components
- Cable Bushing/Clip/Sticker
- Screw/Spacer
- Cable accessories
- Tube
- Electrical Conduits
- Duct/Wiring
- Electrical Wiring Tools
- Dedicated tools
- Soldering supplies
- Electrical & Controls
- Cutting Tools
- Carbide End Mill
- HSS End Mill
- Concrete Drill Bits
- Milling Cutter Insert / Holder
- Core Drill Bits
- Customized Straight Blade End Mill
- Dedicated Cutter
- Crinkey Cutters
- Turning Tool
- Drill
- Cutting Tool Accessories
- Screw Hole Related Tools
- Reamer
- Electric Drill Bits
- Chamfering, Centering Tool
- Hole Saws
- Magnetic Drill Press Cutters
- Step Drills
- Wood Drills & Cutters
- Processing Tools
- packing & logistics storage supplies
- Safety Products
- research and development & cleanroom supplies
- Press Die Components
- Plastic Mold Components
- Ejector Pins
- Sleeves, Center Pins
- Core Pins
- Sprue bushings, Gates, and other components
- Date Mark Inserts, Recycle Mark Inserts, Pins with Gas Vent
- Undercut, Plates
- Leader Components, Components for Ejector Space
- Mold Opening Controllers
- Cooling or Heating Components
- Accessories, Others
- Components of Large Mold, Die Casting
- Injection Molding Components
- Purging Agent
- Injection Molding Machine Products
- Accessories of Equipment
- Auxiliary Equipment
- Air Nippers
- Air Cylinders
- Air Chuck for Runner
- Chuck Board Components
- Frames
- Suction Components
- Parallel Air Chuck
- Special Air Chuck
- Mold Maintenance
- Heating Items
- Heat Insulation Sheets
- Couplers, Plugs, One-touch Joints
- Tubes, Hoses, Peripheral Components
Applications
Brands
- Webcode Seach | Series
-
#CODE
- Discontinued Products
Suruga Seiki Manual Goniometer Stages
| Days to Ship |
|
|---|
-

Manual Goniometer Stages - 1-Axis, Crossed Roller Guide, Worm Gear, B56
Suruga Seiki
High accuracy and smooth operation goniometer stage that uses a crossed roller guide and a worm gear feed mechanism.Ideal for frequent operations.
[Features]・ High accuracy
High accuracy of rotation center runout accuracy of 0.01 mm or less
· Wide variations
Vernier scale (minimum reading 0.1°) is attached to the side, and the clamp position can be selected from L and R according to the installation location
[Applications]・ Precision adjustment of cameras, microscopes, sensors and optical components
・ Positioning of production, assembly and inspection processes related to semiconductors and measuring instruments- Volume Discount
Days to Ship: 8 Days or more -

Manual Goniometer Stages - 1-Axis, Crossed Roller Guide, Micrometer, B58
Suruga Seiki
A high-resolution, high-accuracy goniometer stage that uses a crossed roller for the travel guide and a micrometer for the feed mechanism.[Features]・ High accuracy
High accuracy of rotation center runout accuracy of 0.01 mm or less
· Wide variations
The clamp position can be selected from L and R according to the installation location, and the micrometer position can be selected from center-drive and side drive
The stage surface size can be selected from 40 × 40 mm, 50 × 50 mm, 60 × 60 mm, 70 × 70 mm
[Applications]・ Precision adjustment of cameras, microscopes, sensors and optical components
・ Positioning of production, assembly and inspection processes related to semiconductors and measuring instruments- Volume Discount
Days to Ship: 8 Days or more -
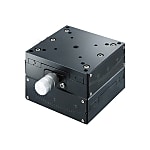
2-Axis Dovetail Goniometer Stage (B55)
Suruga Seiki
Two-axis goniometer stage with a high cost-effectiveness that uses a dovetail for the travel guide and a worm gear for the feed mechanism.
"Features” · Various variations
The optimum size can be selected according to the mounted object.
(25 × 25 mm, 30 × 30 mm, 40 × 40 mm, 50 × 50 mm, 60 × 60 mm, 80 × 80 mm)
In addition to the vernier scale (minimum reading 0.1°) on the side, the clamp position can be selected from L and R according to the installation location.
[Applications]
・ It can be used in a wide range of applications such as research and development, jigs, production equipment, and embedment of equipment- Volume Discount
Days to Ship: 8 Days or more -
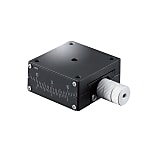
Manual Goniometer Stages - 1-Axis, Dovetail, B54
Suruga Seiki
A cost-effective dovetail goniometer stage that uses a worm gear feed mechanism.
[Features]· A wide range of variations
Ideal size can be selected according to the mounted object
(25 × 25 mm, 30 × 30 mm, 40 × 40 mm, 50 × 50 mm, 60 × 60 mm, 80 × 80 mm)
Vernier scale (minimum reading 0.1°) is attached to the side, and the clamp position can be selected from L and R according to the installation location
[Applications]
・ Can be used in a wide range of applications such as research and development, jigs, production equipment, equipment integration, etc.- Volume Discount
Days to Ship: 8 Days or more -
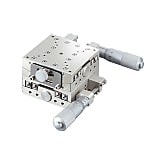
2-Axis Crossed Roller Goniometer Stage, Micrometer (B59)
Suruga Seiki
High-resolution, high-accuracy goniometer stage that uses a crossed roller for the travel guide and a micrometer for the feed mechanism.
"Features” · Various variations
The clamp position can be set either on the right or the left in order to adapt to the installation location,
while certain available types allow the micrometer orientation to be selected from either center-drive or side-drive.
The stage surface size can be selected from 40 × 40 mm, 50 × 50 mm, 60 × 60 mm, 70 × 70 mm.
"Applications" · Precision adjustment of cameras, microscopes, sensors, and optical parts
・ For positioning during production, assembly and inspection processes related to semiconductors and measuring instruments- Volume Discount
Days to Ship: 8 Days or more -
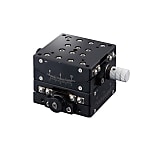
2-Axis Crossed Roller Goniometer Stage, Worm Gear (B57)
Suruga Seiki
High-accuracy goniometer stage with excellent operability that uses a crossed roller for the travel guide and a worm gear for the feed mechanism.
It is ideal for frequent operations.
・ High accuracy
High accuracy of 0.01 mm or less of rotation center deflection accuracy.
· Wide variations
In addition to the vernier scale (minimum reading 0.1°) on the side, the clamp position can be selected from L and R according to the installation location.
"Applications" · Precision adjustment of cameras, microscopes, sensors, and optical parts
・ For positioning during production, assembly and inspection processes related to semiconductors and measuring instruments- Volume Discount
Days to Ship: 11 Days or more
| Brand |
|---|
| Product Series |
| CAD |
| Days to Ship |
| Goniometer Axis |
| Travel (Range)(mm) |
| Load Capacity (Range)(N) |
| Table Size (Length) L (Range)(mm) |
| Table Size (Width) W (Range)(mm) |
| Overall Height H (Range)(mm) |
| Feeding Method |
| Center of Rotation Height (Range)(mm) |
| Guiding Mechanism |
| Table Material |
| Table Surface Treatment |
| Brand | Suruga Seiki | Suruga Seiki | Suruga Seiki | Suruga Seiki | Suruga Seiki | Suruga Seiki |
|---|---|---|---|---|---|---|
| Product Series | Manual Goniometer Stages - 1-Axis, Crossed Roller Guide, Worm Gear, B56 | Manual Goniometer Stages - 1-Axis, Crossed Roller Guide, Micrometer, B58 | ||||
| CAD |
|
|
|
|
|
|
| Days to Ship | 8 Days or more | 8 Days or more | 8 Days or more | 8 Days or more | 8 Days or more | 11 Days or more |
| Goniometer Axis | - | - | - | - | - | - |
| Travel (Range)(mm) | Up to ±10 | - | Up to ±10 / ±10 to 20 / ±20 or More | Up to ±10 / ±10 to 20 / ±20 or More | - | Up to ±10 |
| Load Capacity (Range)(N) | 5 to 30 / 30.1 to 50 | 5 to 30 / 30.1 to 50 | 5 to 30 / 30.1 to 50 / 50.1 to 100 | 5 to 30 / 30.1 to 50 / 50.1 to 100 | 5 to 30 / 30.1 to 50 | 5 to 30 / 30.1 to 50 |
| Table Size (Length) L (Range)(mm) | 41 to 60 / 61 to 90 | 26 to 40 / 41 to 60 / 61 to 90 | Up to 25 / 26 to 40 / 41 to 60 / 61 to 90 | Up to 25 / 26 to 40 / 41 to 60 / 61 to 90 | 26 to 40 / 41 to 60 / 61 to 90 | 41 to 60 / 61 to 90 |
| Table Size (Width) W (Range)(mm) | 41 to 60 / 61 to 90 | 26 to 40 / 41 to 60 / 61 to 90 | Up to 25 / 26 to 40 / 41 to 60 / 61 to 90 | Up to 25 / 26 to 40 / 41 to 60 / 61 to 90 | 26 to 40 / 41 to 60 / 61 to 90 | 41 to 60 / 61 to 90 |
| Overall Height H (Range)(mm) | 15.1 to 20 ~ 25.1 to 30 | 15.1 to 20 ~ 25.1 to 30 | 25.1 to 30 ~ 50.1 to 60 | 1 to 15 ~ 25.1 to 30 | 35.1 to 40 ~ 50.1 to 60 | 35.1 to 40 ~ 50.1 to 60 |
| Feeding Method | Worm Gears | Micrometer Heads | Worm Gears | Worm Gears | Micrometer Heads | Worm Gears |
| Center of Rotation Height (Range)(mm) | 40.1 to 50 ~ 100.1 or More | 35.1 to 40 ~ 100.1 or More | 15.1 to 20 ~ 90.1 to 100 | 15.1 to 20 ~ 100.1 or More | 35.1 to 40 ~ 90.1 to 100 | 40.1 to 50 ~ 90.1 to 100 |
| Guiding Mechanism | Cross Roller | Cross Roller | Dovetail Slide | Dovetail Slide | Cross Roller | Cross Roller |
| Table Material | Aluminum / Brass | Aluminum | Aluminum / Brass | Aluminum / Brass | Aluminum | Aluminum / Brass |
| Table Surface Treatment | Black Anodize / Clear Anodize / Nickel Chrome | Black Anodize / Clear Anodize | Black Anodize / Black Oxide | Black Anodize / Black Oxide | Black Anodize / Clear Anodize | Clear Anodize / Nickel Chrome |
Loading...
Configure
Specification/Dimensions
-
Metric / Inch
-
Goniometer Axis
-
 X Axis
 -
 XY Axis
-
-
Travel (Range)(mm)
-
Load Capacity (Range)(N)
-
Table Size (Length) L (Range)(mm)
-
Table Size (Width) W (Range)(mm)
-
Overall Height H (Range)(mm)
The height is from the bottom to the top of the mounting surface. The micrometer head is not counted for the measurement.
-
Feeding Method
- Feed Screw
- Micrometer Heads
- Worm Gears
-
Center of Rotation Height (Range)(mm)
-
Guiding Mechanism
- Dovetail Slide
- Cross Roller
- Slide Guide
-
Table Material
-
Table Surface Treatment
- Black Anodize
- Black Oxide
- Low Temperature Black Chrome
- Clear Anodize
- Nickel Chrome
Narrow search by specifying Manufacturer
CAD
-
- 2D
- 3D






How can we improve?
How can we improve?
While we are not able to respond directly to comments submitted in this form, the information will be reviewed for future improvement.
Customer Privacy Policy
Thank you for your cooperation.
While we are not able to respond directly to comments submitted in this form, the information will be reviewed for future improvement.
Please use the inquiry form.
Customer Privacy Policy